Hey there gang!!!! You know I am always busy cooking up some great new projects so I thought I'd take some time from my day (what little I have) and share one of them with you :-)
For Valentine's Day, I wanted to make something for my Daughter's Teacher that was different than most gifts. I came across a Desk Top Calendar Easel Box that looked PERFECT for the task at hand!!!! I also used Tabitha's February Inspired Challenge to give me inspiration for the color theme. Her photo had "Spunky" written all over it and that's just what I wanted to accomplish!!!!! Here is what she gave us to draw inspiration from...
Why not give it a shot, right?!?!? And so I began... and what seemed to be a very easy project turned into a project of all out perfection!!!
I started cutting, scoring, and putting all the pieces together and everything looked very nice. However, I was not satisfied with the actual stability of the box. I wanted something that would hold up through the years. So I added cardboard to all the pieces and wrapped even more cardstock around it!!!
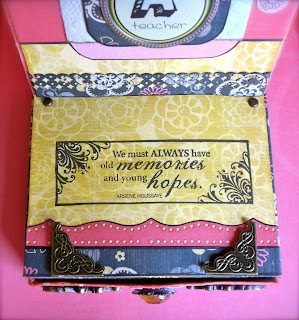
Once the box was together I worked on all the details. I added some borders that I punched with my EK Succes Lattice punch, and of course inked the edges of anything and everything that went into this project :-) I added the sentiment from a Bravissimo package I found at Joanns like forever ago!!!! I also added two metal photo corner pieces to hold the calendar in place once it's in. I also stamped the top of the box (which will be under the calendar piece) with a quote that reads: "We must always have old memories and young hopes". I attached two small brads at the top of the box to make sure the calendar stays in an upright position. The calendar piece will help with that also.
I wanted some detail on the drawer so I used a large gem brad made by The Paper Studio that I Picked up at Hobby Lobby, added some springs and hot glue to the back, giving it some depth so that you can actually grab it to pull out the drawer! The flourishes are made my Jolees Boutique and are actually brass plated plastic pieces. I think they look great though :-)
For the calendar months themselves, I found free templates online and used Powerpoint to customize them and get them down to size. I printed them out on alternating coordinating cardstock and then adhered them to a piece of cardboard for sturdiness. And of course, I inked the edges!! Hahahaha!!! Real surprise there :-)
I also wanted some "motivational" quotes for each month so I stamped the back of them with sentiments. Here's a peak...
Here's a view of the box opened and with the calendar months inside. They were a perfect fit :-)

And here's a final peak at the whole box together. The easel card stands up so you can see the calendar, but also folds down as a convenience. I just LOVED all these colors together and how the box came out.
I truly hope the teacher appreciates this as I just had so much fun creating it :-)
Here's the link to a free tutorial if you decide you want to make one for yourself!!! I have to warn you though... they are addicting!! I'm already working on me second one for my husband :-)
Well, gan... as usual .. Thanks for stopping in and have a LUCKY day!!!!!!! :-)


No comments:
Post a Comment