June 2014

June 2014
Showing posts with label altered. Show all posts

Friday, May 22, 2015

Frosted Designs Friday Challenge: String Art!!!

Hello everyone!!!  I know it' been a while since you've heard from me.  Most of you are aware that my mother passed away earlier this year and everything has really been hectic ever since! 
 
Any who, I'm on the blog today with an altered frame I made for my mother's best fried using last month's kit from Frosted Designs.  It features the Heidi Swapp "Wanderlust" collection :-)
 
Here's a look:
 
 
I covered the frame with some of the paper from the kit, then used trim, flowers and embellies from previous month's kit to beautify it ;-)
 
I added some flowers in the bottom left corner as well as a metal clock from Tim Holtz.
 
 
This challenge is "string art" which is to incorporate string in your project.  I used one of the wooden embellishments from the last month's kit, colored it with gold mist and a gelly roll pen, then added small bits of blue twine for detail!
 
 
I misted the color magic title pieces with gold and added them to the frame!
 
 
I finished the frame with some yummy Creative Embellishments chipboard.  The chipboard was misted with white spray, then I used a gold marker to add polka dots!


Well gang...  Thanks so much for stopping in and have a LUCKY day :-)
 

Thursday, January 1, 2015

Altered New Years Hat for Creative Embellishments!

Happy New Years folks!!!!  I hope you had a safe and beautiful beginning to this wonderful year ahead!!!  I'm popping in today because it's the first... Which means a new challenge over at Creative Embellishments!!!


Here's a look at this month's inspiration photo:

I found a chipboard hat at my local Michael's and decided to dress it up for New Years!  Here's a look:

LOVE these wings!!!  They are stunning!!!!
I picked up this paper mache hat at my local Michaels for about a $1.00!
 
I started by priming my hat and coating it with black glittered spray paint.  I used my Cricut Explore to make a stencil for a 3/4 inch circle.  I mixed up some silver glitter and molding paste and added it through the stencil around the hat for a circle pattern!  


I primed my chipboard wings, then used gold pigment ink to color them.  I spritzed them with Perfect Pearls mist in Gold for added shimmer and shine!


I finished the hat with some gold trim, some clocks by Tim Holtz, and Thickers "DIY" numbers sprinkled with the same silver glitter!


Well gang...  Thanks so much for stopping in!  Have a LUCKY day :-)


Wednesday, December 24, 2014

Last Minute Gift Ideas for the Holiday!!!!

Hey there crafty neighbors!!!!  I'm up on the Creative Embellishments blog today with some last minute gift ideas!!!
I'm sure you are just as busy as we are during the holiday season so I will make this short and sweet!!  

Here's a look:
DSC07611

I picked up these frames at my local craft store for about $.30 each.  I painted them, added papers from this month's traditions kit from Frosted Designs and a picture, then embellished for an outstanding gift for the holiday!

For the first one, I used the "Flourish 6" piece which was painted with Luminarte paints, then coated with distress crackle paint for texture.  Once dried, I added gold stickles to the ends of the leaves for accents :-)

DSC07617


DSC07622

For my second piece, I used the word "Amazing" which I sprayed with Maya Road "white out" mist.  Once dried, I used a sharpie brush tip marker on the upper half, then added gold stickles again for accent!

DSC07623


DSC07632

For my last altered frame, I used the "Flourish 22" chipboard piece (one can never have too many flourishes!!!) that I colored using a brush tip sharpie some Luminarte Paint for shimmer.  Once dried, I used my white Signo pen for accents and topped it off with stickles!!!

DSC07646


DSC07653
Well gang...  Thanks so much for stopping in.  Have a beautiful holiday!!!!!
brandi

Saturday, December 6, 2014

Altered Canvas with Simple Stories "Cozy Christmas" from this Month's "Traditions" Kit!!!!

Hello there gang and happy December!!!  Yes, the last month of the year has finally snuck up on us which means: new month, new kit, and a new challenge!!!

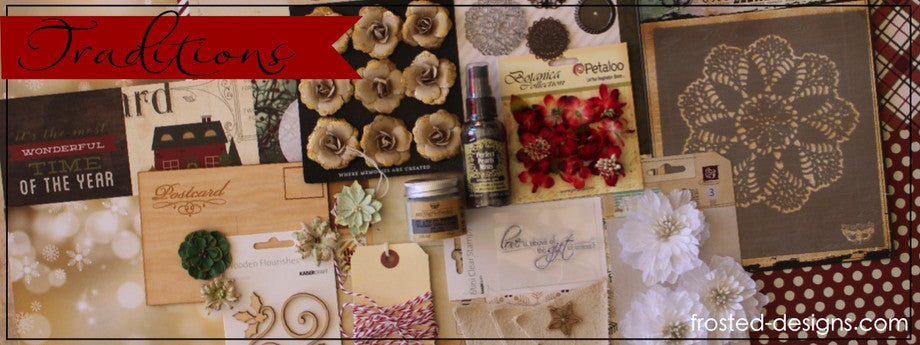
Here's a look at all the beauty that's included in the "Traditions Kit":

Oh, I just LOVE this time of the year!!!  The beautiful colors are like heaven to my eyes :-)  It also means that I get to take my "altered project making" to a whole new extreme!! Seriously, projects for days!!!

We also have a new challenge for you!!!  Just create ANYTHING you like using ANY Frosted Designs kits (past or current) for your chance to win a prize pack valued at over $30.00 from Scrapmatts!!!!!

Now, here's a look at what I created:

Isn't it a fabulous addition to any holiday room decor?!?!  

Here are some close-ups:
I started by painting the canvas, using painters tape to mask off the areas in between colors.  Once it dried, I chose my favorite "card" from the papers included and adhered it to the canvas.  I cut a frame using my trimmer and some chipboard, then added my desired paper atop of it.  I also added some flowers and one of the metal embellies from the kit :-)  

I love the look of raw wood and especially for this kit!  I just sprayed a little of the Perfect Pearls Gold Shimmer mist from the kit for some shine and left it alone :-)


I finished the piece with several cut up pieces of twine to make this a complete wall hanging!!!


 Well gang...  Thanks so much for stopping in and have a LUCKY day :-)


Products used from the Frosted Designs Store:


Monday, December 1, 2014

Advent Calendar for Creative Embellishments with MME Vintage Christmas!!!!

Hello everyone and welcome to December!!!!! Can you say... excited?!?! I LOVE this time of year!!!  

A new month means a new challenge over at Creative Embellishments and we have a spectacular challenge!!! Here's this month inspiration photo:

Creating altered projects is my favorite past time but making Christmas projects is just so much more fun!!! I decided to make an advent calendar for my girls this year using a paper mache one I picked up at my local craft store. 

I coated it in white paint, then added my papers from the MME "Vintage Christmas" paper pad (LOVE the colors and patterns in this one!!), adding some depth with the "Distressed Burlap" stamp. I added a bunch of the Chipboard Snowflakes that were misted with white, then coated with gel medium and glitter! I used the leftover medium mixture and a snowflake stencil to create iridescent snowflakes on the back! I colored the "Merry Christmas" title with red distress ink, homemade glimmer mist, and a green Sakura glaze pen. I used the same glimmer mist(a gold shimmer) to color the Christmas Bulb "hanging" from my title! I finished the calendar with the smaller Santa's Sleigh from the pack, using various mists to achieve my desired results!!!

Here are some close-ups:


Well gang... Thanks so much for stopping in and have a LUCKY day :-)

Tuesday, November 18, 2014

Tutorial Tuesday: Altered Tag with Frosted Designs

Hello everyone and happy Tuesday!! It's Brandi here today with a quick mixed media/altered tag tutorial using this month's fabulous Rustic Beauty Kit!!

First, here's another look at this month's kit:

Isn't it amazing?!?!

And here's a look at the tag I created using goodies from the kit:


Isn't it lovely?!? I just love the colors in this kit and the goodies to play with :-)  Here are the steps to create the look!


1.  Grab one of the tags, ink, and something to apply the ink.
1.  Create a base on the tag using the ink and stencil included in the kit.
2.  Using the same ink, go around the edges of the tag.


4.  Grab the marker, stamp, and mini mister.
5.  Color directly on the stamp with the marker and mist a small amount of water.  Stamp over tag sporadically until you receive your desired look!
6.  Add some of the die-cuts from the kit around the tag and distress the edges.


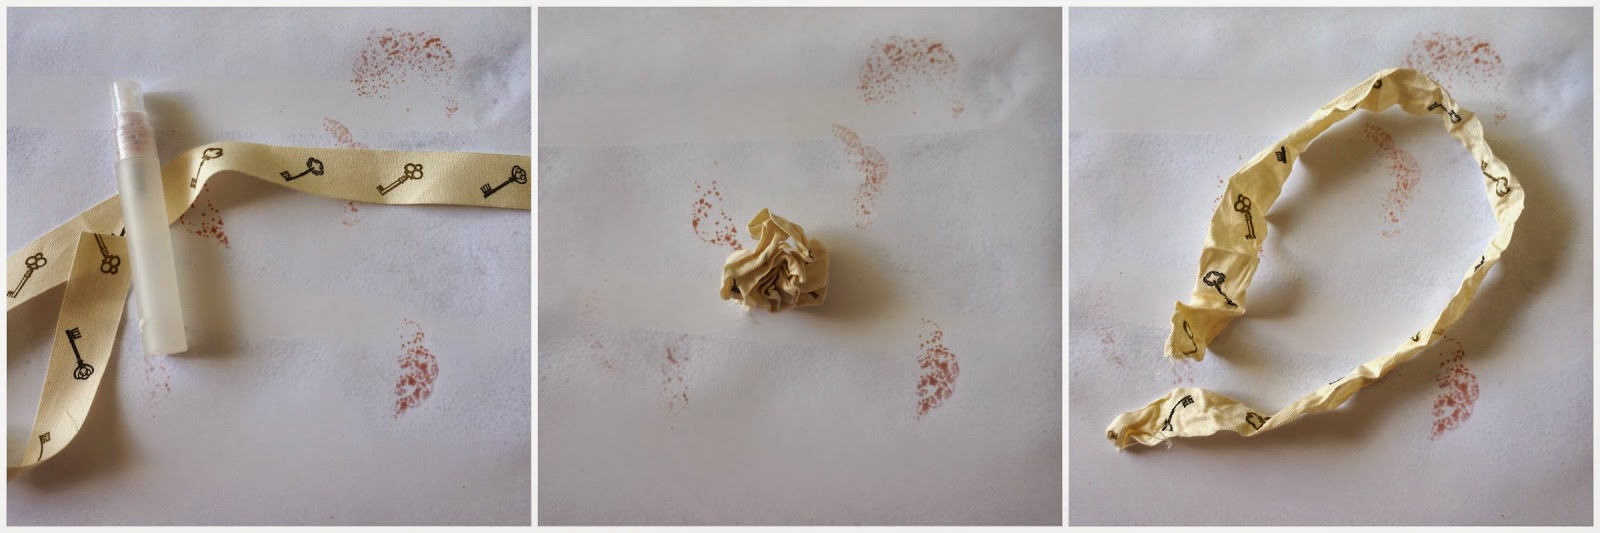
7.  Grab some of the trim from the kit and mini mister.
8.  Mist a generous amount of water over the trim and crinkle it up.
9.  Once dry, unravel the trim and use for bow!


There you have it gang!!!  Can't wait to see what you create!!!!!


Friday, October 31, 2014

Happy Halloween: Altered Mini Coffin and Steampunk Card!!!


Hello everyone and HAPPY HALLOWEEN!!!!  This is big day here in the states and one of my favorite holidays of the year!!!!  I'm just popping in to share some projects I created this month for this splendid day :-)

This is a card I created for WCM over at Sketch N Scrap!  The challenge here was to create a Halloween card or card made using primarily orange (something I barely have at all in my stash!!!).  Here's a look:


Frosted Designs is also showing off some fabulous Halloween projects on the blog today!  I created an altered mini-coffin using the Graphic 45 Steampunk Spells collections!  Here's a look:

Well gang... Thanks so much for stopping in and have a LUCKY day :-)
 photo 84c064ac-ab01-4e94-bb12-3b3893d8f8eb_zpsabe08004.png