June 2014

June 2014
Showing posts with label gelatos. Show all posts

Monday, June 9, 2014

LGS with Prima's Time Traveler Collection!!!!

Hey there fellow crafters!!!  School is officially out here in Florida and summer is well under way!  

I'm popping in today to share the new weekly sketch over at Let's Get Sketchy!  Here's a look:


LOVE this sketch!!!!  And, of course, I had to use the goodies from this month's "Capture the Moment" kit over at Frosted Designs! It's packed full of Prima products, including the new Time Traveler collection, as well as Cartographer, and Stationer's Desk too!  Just look at how beautiful these papers and embellies are!!!

From This Moment with Prima's Time Traveler Collection

I am truly having so much fun playing with all these Prima goodies!!!  It's like heaven over here!!!  
I started my page by building up my background with molding paste and gelatos.  


After blending the gelatos with a baby wipe, I did some random stamping using various stamps and a Faber Castell Big Brush Pen.


I found this chipboard postage stamp piece in my stash and decided to give it a treatment of Lindy's Starburst Pearls and the Perfect Pearls Spray included in this month's kit.


I gave the same treatment to one of the white Petaloo flowers, also in the FD store!


I ordered this bird cage template from the store and thought it perfect for this page!!!  I used some Walnut Stain distress ink and the liquid pearls from the kit to create this look.


The Prima trim in the kit is fabulous and goes with pretty much any style of crafting!!!  I used it to add a cute little bow around my picture!!!  I also added more flowers and wood icon pieces!


I finished the page with a chipboard title from Creative Embellishments (LOVE their chipboard!!!!).  I first sprayed it with the inks mentioned above, then heat embossed random areas with Distress Powder in black.  


This is a very special page and will definitely go in our wedding album (one of them!!!).  


Well gang...  Thanks soooo much for stopping in and have a LUCKY day :-)

 photo 84c064ac-ab01-4e94-bb12-3b3893d8f8eb_zpsabe08004.png

Monday, May 12, 2014

First Attempt at Art Journaling... Already Hooked!!!!

Hello crafty neighbors!!!  Hope you're having a fabulous start to your week :-)

I'm popping in to share my very first attempt at an art journal page!!! I've seen the pages and LOVE all the different techniques used.  I've followed along with the "Sundays With Sandee" series over on the Frosted Designs Blog for tips, tricks, and ideas!!  I even "subscribed" to Design Memory Craft's blog because I love the inspiration from their fabulous Design Team! So, I finally made a purchase through the Frosted Designs Store to gather some "art journaling" supplies and give it a shot!

I am entering my first Art Journal page to the Design Memory Craft monthly challenge!  The challenge is to use at least TWO of the following (I used the ones in red!):


Stamper's Big Brush pens (I used the Black one)
Gelatos (I chose the "Tropical" pack)
Textural Accents & Tools (Gesso AND Gel Medium)


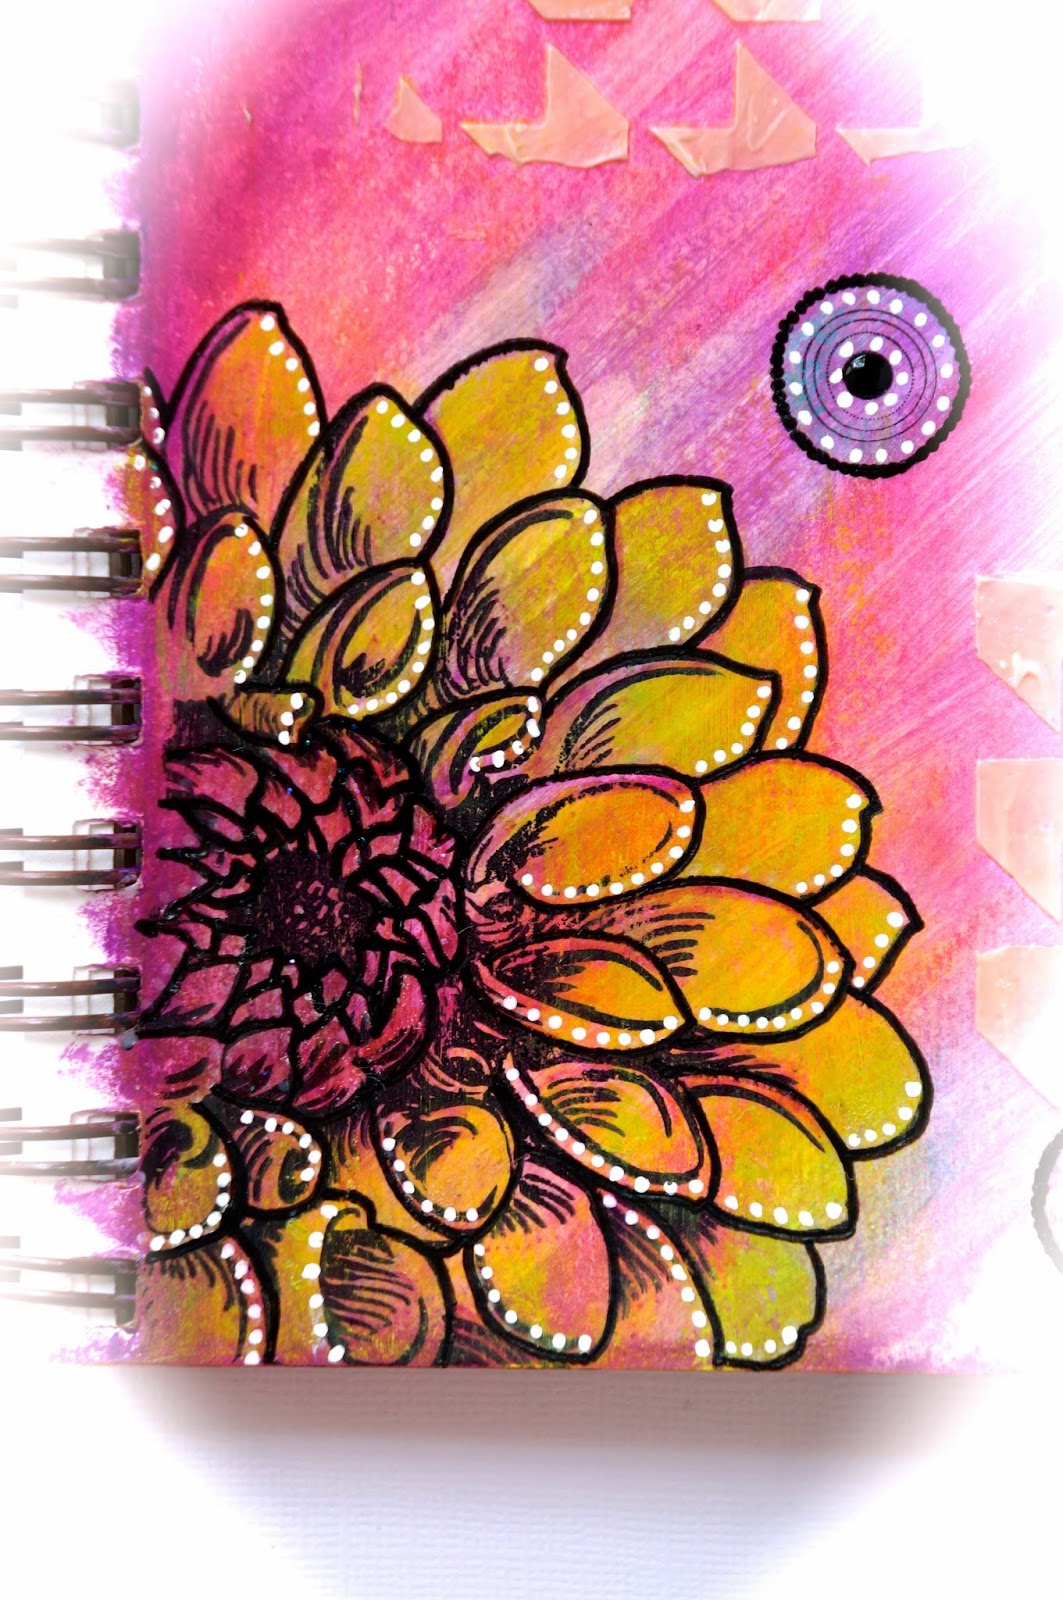
Here's a look at my finished page (I only did one side of the journal just as an "experiment"!  I didn't want to get overwhelmed on my first try!):


I have to admit...  I am IN LOVE with this already!!!  It's actually relaxing to just be able to sit and create freely!!  I can tell that this is the start of something new in my crafty world!!!  Hahaha!!!!
Here's a picture of the items I used to create this page:


I started by priming my page with a coat of Faber Castell gesso.  I took three of the gelatos from the "Tropical" pack (Watermelon, Raspberry, and Snow Cone) and colored randomly over my background.  Then, I took a small paint brush and some water to blend it all together!  Once dry, I used the Faber Castell "Gel Medium" to seal it all in!  I came back and added some texture with a Heidi Swapp mini stencil and some molding paste! 


I have tons of stamps... TONS!!!!  I use them for cards, and sometimes even for scrapbook pages, but now... Oh, now I will be using them much, much more!!!
I chose a large flower stamp by Inkadinkadoo and used a black Stampers Big Brush pen to add it to the corner of my page.  I used the "Margarita Mix" gelato from the pack to color in the flower, then added some shading with one of my Spectrum Noir markers!  I finished the flower by outlining it with a Sakura black Glaze Pen and tiny white dots created using my White Uni-Ball pen from the Frosted Designs Store!


I used another (smaller) flower stamp by Inkadinkadoo and the big brush pen to add a flower to the top right of my page.  I used the "Raspberry" and "Margarita Mix" gelato to shade it in, then added the same effects as the other flower!


I finished my page with a sentiment stamp from a Dylusions pack that was perfect for my first journal page!!!  It reads:
"Until you spread your wings, you have no idea how far you'll fly"


I am soooo excited (and proud of myself) that I finally gave this a shot!!!  I am finding that I am walking further and further away from my "comfort zone" and am loving the results!!!


Well gang...  Thanks soooo much for stopping in and have a LUCKY day :-)

 photo 84c064ac-ab01-4e94-bb12-3b3893d8f8eb_zpsabe08004.png

Saturday, February 15, 2014

Mixed Media Canvas for the "Love" Challenge at Colorful Creations!!!

Hello again everyone!!!  I hope you had a fabulous Valentine's Day!!!!  

Speaking of Valentine's day, there is a new "LOVE" challenge up at Colorful Creations!!!! The challenge is super simple...  Just incorporate the word "Love" into your project and you're in it to win it!!!

Mixed Media Canvas using the January Kit from Frosted Designs
I decided on making a mixed media/altered canvas for the challenge (my first ever!!!).  I used the "Love is in the Air" January Kit from Frosted Designs which included the Teresa Collins "You Are My Happy" collection.  Here's a look at the finished piece:


I really wanted to incorporate love and nothing says that better than a whole lot of PINK!!! Hahahaha!!!!

I started by adding a coat of gesso over my canvas and let it dry.  Then I sprayed Dylusions "Bubble Gum" mist all over for color.  I added gold gelato around the edges and worked it in really well with a water brush.  


I used the Heidi Swapp honeycomb stencil and molding paste mixed with the gold gelato to add some texture to the background.  I also added the pink bling from the kit to random parts of the design!


I used my heart punch and papers from the kit to create a small banner at the top of the canvas:


I just love the chevron wood veneers by UmWow studios (also from the Frosted Designs Store).  I added some gesso colored with the mist and topped them off with Rock Candy distress glitter.


I finished the canvas with the beautiful burlap heart in the kit.  It's really a gorgeous piece!!!  I put some of the Petaloo flowers on the top and sides, and added Maya Road resin flowers around the entire canvas for detail.


I just love the way this whole piece came together!!!  I will certainly be doing another one soon!!!!

I am also sharing this with Crafty Creations, where you can upload your most recent paper craft projects, at The Memory Nest!


Well gang...  Thanks so much for stopping in and have a LUCKY day :-)

Tuesday, December 31, 2013

Exciting Design Team Changes and Sketches4All Mixed Media Challenge!!!

Happy New Year all!!!!  I hope you have a fabulous (and SAFE) New Year's!!!  I truly can't believe that 2014 is already here!!!!

With the start of the New Year, there is also some exciting news!!!  

First, I would like to announce that I will now be on the 2014 Design Team for....  FROSTED DESIGNS!!!!!! I can't tell you how happy this makes me!!! I have been "playing along" with them for quite some time and am always inspired by their very talented DT.  And now, I'm a part of it!!!!  When you have a moment, please stop in and check out their blog: http://www.frosteddesigns.blogspot.com/ and Store: http://frosted-designs.com/.  Frosted Designs is a "Kit Club" but their store is loaded with wonderful collections, embellishments, mixed media supplies, etc.  I will be sharing my first project with them on January 7th :-)

Secondly, as most of you know, I have been on the Design Team with Colorful Creations for a little over 18 months now.  The site is undergoing some changes and effective January 1st, it will be a Challenge Blog!!!  The "ning" site will no longer be there, but the creativity and inspiration will continue to flow on the blog!!!  Stop in and check it out: http://colorfulcreations2014.blogspot.com/.
 

"Altered Trinket Box" with Crate Paper "Maggie Holmes" Paper Pad
Okay... Now that I have the "big" news out of the way, I'd like to share a few projects I've been working on for the New Year!!!  Sketches4All is hosting a "Mixed Media" challenge for the month of January... That's right... GET MESSY!!!!!  Any type of mixed media work is fine!  
I decided on making a trinket box for the challenge.  I found this unfinished wood box at Michael's on clearance because the clasp was broke.  No biggie!!!  I knew I was going to replace it anyway!!!  
Here's a look at the box before I started working (I already painted it when I took this photo! Please excuse the first few pics as it was already dark outside!)


I started by measuring the box and cutting out paper pieces accordingly (American Crafts 'Maggie Holmes' paper collection).  I inked all the edges with Distress Ink, then got to work!!!!


I layered on some Mod Podge (matte used here!) and started adding my pieces.


After all the paper was on, I added another layer of Mod Podge for sealing purposes.  Then I started to embellish!  
I just love the rose trim by Tim Holtz!  It's so pretty and very versatile.  I colored it with "Chipped Sapphire" Distress Stain (which left my hands blue for days!!!) and added it to the base of the box.  I added another pink trim with pearls directly above that.  I used my Martha Stewart "doily" edge punch and created a border to go down the center of the box.  I then added a pink ribbon atop of the punched piece and strategically placed tiny pink rhinestones around the entire box.  I then added some flowers by Martha Stewart and Recollections, metal pieces painted with "Silver" Liquid Leaf, and blue felt and inked paper to the inside for a finished look!!!

Here is the finished product!!!!


Isn't it beautiful?!?  And to think... This box only cost me $1.75!!!!  AWESOME :-)

 
"Christmas Cheer" Scrapbook Layout with Simple Stories "Handmade Holiday" Collection
Next on the list is a page I created for my January Sketches4All "Once Upon A Theme" Challenge!!!  
I decided for January, I would do a "Cheer" theme!!!  Holidays always seem to bring people cheer and what better way to show it than with a scrapbook page?!?  
I used Sketch # 105 from Sketchabilities to complete this page:


This is my oldest daughter on Christmas of last year:


I used the Simple Stories "Handmade Holiday" paper collection to make this layout.  It's full of awesome elements and tidbits for "fussy cutting"!!!  The tree has buttons designed onto the paper so I added real ones for detail where they lay.  
I made the "pocket" with coordinating paper and used a White Gelato by Faber Castell and a snowflake stencil to create the
design.  I finished the page with tiny chipboard stars by Studio Calico (purchased from the Frosted Designs Store!!!).  
Here are a couple of close-ups:


Well gang...  Thanks soooo much for stopping in and have a LUCKY day :-)

See you next year!!!!