June 2014

June 2014

Thursday, August 15, 2013

Deconstructing Heidi Swapp!

Happy Thursday Gang!!!  I have been working on a few things here lately and decided to give you a peak at one of the items!!!

"Take Wing" Handmade Birthday Card using Heidi Swapp
One of my FAV card sketch sites is Deconstruted Jen.  She has WEEKLY sketches to feed your addiction!!! Here is this week's sketch:

I had some Heidi Swapp "Sugar Chic" scraps lying around that were PERFECT for a card for my sister!!!  Here's a look:

I absolutely LOVE this paper line but have certainly used almost ALL of it... every LAST piece!!!!
I followed the sketch quite literally, which is a little unusual for me :-)
I started by using my black Sharpie to outline most of the pieces, and used stamps by Heidi Swapp and Studio 112.  I pulled out my Pink Shimmer Mist to dye the flower ribbon trim, added a few pearls, and a bit of ribbon and various cords.  I hand stitched the pocket on the front, adding a tag on the inside that quotes "You Make My Day"!!!  My sister has recently moved and I miss her dearly... We are as close as close can be!!!! 

Well gang... Thanks so much for stopping in.. Have a LUCKY day :-)

Tuesday, August 13, 2013

New: Card Sketch #7 at Sketch N Scrap!!!

Hey there gang!!! Hope you are enjoying your week thus far!!!
I am writing to tell you about the NEW card sketch over at Sketch N Scrap!!!  Don't forget to stop in and check it out!!!

Handmade Masculine "Lighthouse" Birthday Card
Here's a look at the August 10th Sketch:
Isn't it lovely?!?  I had fun making a birthday card for my uncle using this sketch... Here's a look:
It's a wonderful masculine card for any special man in your life!!!
I used papers by MME and distressed and inked all the edges.  The lighthouse stamp was actually purchased in the dollar bin at Joanns!!!  I couldn't believe the amount of detail in a stamp that cost only $1.00!!!!!  The other stamps are sentiments from a pack by Stampendous. 
For the edge, I cut some kraft paper and stamped it with a "distressed" type stamp using Brown Stazon Ink.  I adhered it to the side, then hand stitched the edge using hemp cord.  I topped off the card with a metal piece by Tim Holtz and a button by Recollections!!!  Voila!!!! Another one bites the dust!!! Hahahaha!!!!!
Well, gang... Thanks so much for stopping in and have a LUCKY day :-)

Friday, August 9, 2013

Handmade Minnie Mouse Invitations!

Happy Friday!!! Again!!!!  I just wanted to give you a peak at the new Minnie Mouse invites I promised I'd share...  It's just the outside so far... But I'll post the rest when i'm finished!!!

I came across an embossing challenge over at Frosted Designs earlier this month and thought it would be PERFECT for these invites!!! I already had the "purse" idea in mind but embossing took these invites to a whole new level!!!!  

Here's a look at what I've done so far...


Isn't it just adorable?!?  
I started by digging through my far-too-many cartridges in my Cricut Craft room to design a purse that would fold for an invitation and fit nicely into an envelope!  All the "pre-made" purses have too much depth to send through the mail so I made my own using the "Ornamental Iron 2" cartridge.  I welded together three different shapes, scored where I needed to, and came up with this design that I cut using my Cricut Expression 2!
Then I used my Sizzix Grand Calibur and various Cuttlebug embossing folders to add detail!  I used the "Mickey and Friends" cartridge to cut the mouse and bow, then added rhinestones to the center of the bows.  I finished it with some ribbon tied into a bow to keep the invite closed until it gets to its selected recipient!!! 
Voila!!! An easy invitation that will appeal to almost anyone who loves Minnie Mouse!!!
Here's a couple more pics:


Interested in purchasing these for your own Minnie Mouse lover?!?  Head on over to my Facebook page to see these and other fabulous party favors!!!!


Well gang... Thanks so much for stopping in and have a LUCKY day :-)


New Scrap Your Story and 2 Broke Girls challenges!

Happy Friday all!!!  Is it just me or has this week just flown by?!?!  I'm knee deep in Minnie Mouse invites for my youngest daughter and will post them once they're finished.  With all the glue I've used this week I'm surprised I don't stick to my sheets when I sleep!!!!!

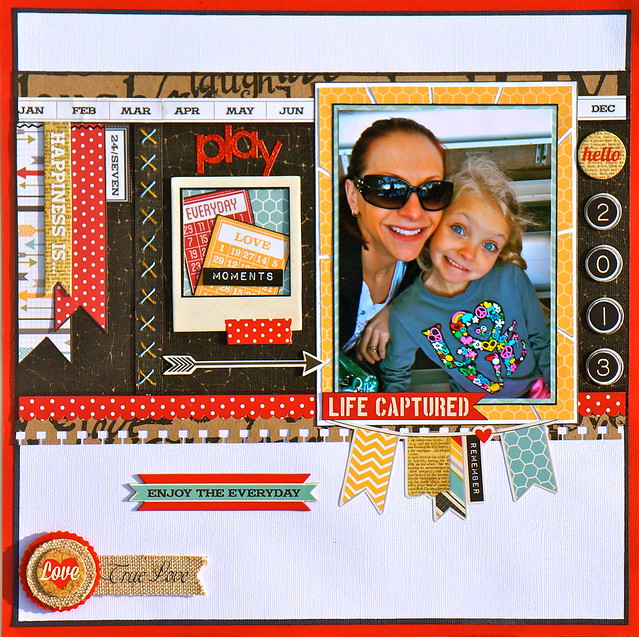
"Play" with Simple Stories 24/Seven
Any who... I have a couple of things to share with you today!  2 Broke Girls has posted Sketch # 15 and it is WONDERFUL!!!! Here's a look:


I've had the Simple Stories 24/Seven line lying around for some time and always forget it's there!!!! So I pulled it out because it was absolutely PERFECT for this sketch!!! Here's what I've come up with:


This picture was taken at Sea World earlier this year... My daughter is such a goof!!! Just like her mother!!! Hahahaha!!!!
Now, about the page... I started with basic Avalanche White Bazzil cardstock layered atop red Bazzil cardstock to add some "pop" to the red in the layout.  I found this "Kraft Core" cardstock by Coordinations and I am in LOVE with it!!! I used a black piece as my "base" for layering embellies.  All the papers and embellies are from the Simple Stories 24/Seven paper line and flow together quite well!!!  I also cut a small piece of the black kraft core cardstock and hand stitched embroidery thread through it to add a "divider" between "sections" following the sketch.  
I also cut the mat behind the photo into a sunburst and layered it on white cardstock to make it "pop" as well.  I have to admit... I wasn't too sure about this at first but I am happy with my final creation!!!! 
This page was also entered into Libby's Song Challenge over at Colorful Creations.

Now onto the next thing on my list.... 

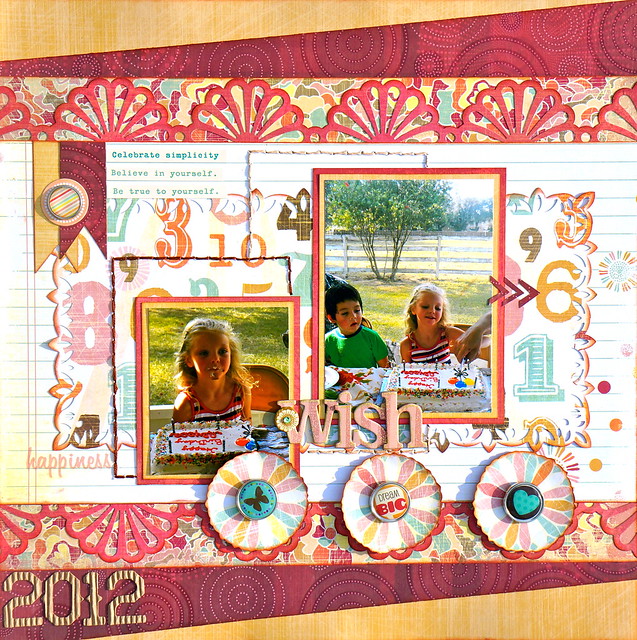
"Wish" using Cloud9 Design
This is a page I crated for the new Challenge #23 over at Scrap Your Story.  The challenge this week is to create a page with a "Birthday" theme.  I happened to have these photos of my oldest daughter on her 6th birthday last year and decided to put them to goo use!!!
Sketch N Scrap also has this WONDERFUL new sketch that I couldn't wait to start on!!! Here's a look:


Isn't it AMAZING?!?
I actually followed the sketch quite literally which is something I don't do very often!!! Hahaha!!!! 
Any who, here's my page:


I used some old papers by Cloud9 Design and a couple of my Martha Stewart punches to complete this one!  
I started by cutting the papers into the "shape" of the sketch and then went to work layering (my "trademark"!).  I fussy cut the flowers from coordinating pattern paper and added some brads for detail.  I hand stitched the squares using colored embroidery thread, added the K&Company chipboard title, and finished it with little quotes at the top.  It is a little "busy" but the sketch itself was too so I guess it's right on target!!!! 
This page was also entered into Brenshevia's "August Plus" Challenge over at Colorful Creations where the task is to create a page using circles, flowers, and butterflies and Cheryl's Fussy Cut challenge over at Sketches4All.

Well, gang... Thanks soooo much for stopping in and have a LUCKY day :-)


Sunday, August 4, 2013

Tim Holtz "Style" Altered Photo Box

Well Happy Sunday gang!!!  It's been pretty rainy here the past few days so I've been able to catch up on a few things....

Tim Holtz "Style" Altered Box
My husband came to me some time ago and asked me to make him something to keep all his tags and bookmarks I make him.  No problemo!!!!  So I went to Michaels and picked up some photo boxes and decided to get to work!!!  

I started by measuring out all my papers and using Mod Podge to get them on the box.  I covered the lid and inside of the box as well.  After all the paper was down, I went to work embellishing!!!!  I didn't want to do too much, as this is for a "man" and it will also be used quite a bit.  I wanted to stay simple with no bulky embellies.  Here's some pics of what I was able to come up with:

These are the sides of the box.  As you can see, aside from just paper, I added some simple things to add detail like the tags (one of which I stamped with various Tim Holtz stamps) and Bingo card.  I also added a button with Crinkle Ribbon which was dyed using Peeled Paint Distress Stain.  


 For the longer sides, I added various stickers and added a quote straight from a pack of Tim Holtz Stamps!!!  I also stamped the famous "Umbrella Man" using Ranger Archival Ink and added some metal trinkets.  

Now for my favorite part... The top of the box!!!! I had a little more play room here so that's exactly what I did!!!  I started by adding paper and tissue tape to completely cover the lid.  I also used thin black tissue tape to separate the top into "sections".   I used several stamps with the Archival Ink and several tid-bits from the paper stacks.  For added detail, I added metal "hands" on the clock.  The "pictures" were cut into strips from the paper pack and added to form a square.  I also stamped the vintage pointing-hand on some grungepaper, then colored it with Distress Markers and adhered it to the top :-) 


My husband's name is Oscar and he went by the name "Osc" in his younger days which was commonly mistaken for "Ox".  This animal card seemed perfect for him!!!!!


I covered the sides of the lid with tissue tape and added metal "label pieces" as handles.  I also used a different tissue tape to cover the sides.  

As I said, I completed the inside of the box as well.  I started by using paper, then cut several "Alphabet Animal Cards" from a piece of paper from one of the paper stacks.  I separated them with black ribbon style tissue tape.  Then I laid a neutral colored piece of felt on the bottom for a "softer" touch :-)


Well gang... I hope you enjoyed looking at my creative ideas!!!!  Thanks so much for stopping in and have a LUCKY day :-)


Thursday, August 1, 2013

2 Broke Girls Overhaul... Great New Look and Prize Giveaway!!!

Well hello and happy August everyone!!!  

This is My Story with Maggie Holmes
Okay... Now this next one is a page I've been wanting to make for quite some time.  This is for my Creative Monthly Project Challenge over at Colorful Creations.  The challenge this month is to explore the world of "paper tearing".  
I, myself, am a "colorful" person of sorts.  I'm outspoken, extremely personable (from many years in the hospitality industry), and sometimes down right obnoxious!!!!  I'm also good-hearted, I give when I can, and help others as much as possible :-)
One way I express myself is through my tattoos.  Yes, I have several of them, and they all provide a glimpse into who I am.  I wanted to make a page that reflects me as an individual.  A page that gives you an idea of "who I am".  And this is it:

This page turned out better than I expected!!!!  I LOVE IT!!!!  I used papers by Crate Paper Maggie Holmes collection to start things off.  I distressed and tore edges, and created the big tear down the center.  I used a MS paper punch to punch the edges of the torn area, then layered punched edges of different paper, ribbon, and a little Liquid Pearls.  I created the flower cluster using various flowers by Recollections and Paper House Studio.  The chipboard pieces are from Blue Fern Studio and were heat embossed, inked,  misted and then topped off with Perfect Pearls and Liquid Pearls.  I used my Spectrum Noir Black Alcohol Marker to go over some teal glittered Thickers so that the chipboard color was black, but the glitter would remain teal to match the page.  This page is easy on the eyes, full of sparkle, and a little rough around the edges.  Pretty much sums me up!!!!!  

"Summertime" Anything Goes at Sketches4All
Sketches4All is hosting a "Summertime" Sketch Challenge where ANYTHING GOES!!!!  That's right... Make what you want as long as you follow the sketch:
I decided on a layout using pics from my trip to Cozumel in 2011.  Here's a look:


I've had these papers by The Girls Paperie sitting for quite some time and thought I would finally put them to good use!!!!  They went well with the photos anyhow!!!  
Instead of using three photos, I cut one into two and then added one of me and my husband on shore.  The embellies and ribbon are all from the same paperline, aside from the K&Company tag (bottom right) and the metal balloon by Recollections.  Looking at these pics make me want to revisit this tropical paradise!!!!!   

Handmade Baby Girl Card using Crate Paper "Little Bo Peep"
This is a card that I made for SketchNScrap's July 20th Card Sketch Challenge and FORGOT to post as we were in Fort Lauderdale!!!!!!  Browsing all my sites last night, I realized I hadn't even posted it yet... Better late than never I suppose!!! Hahahaha!!!

Any who... Here is the sketch:

My husband needed a baby girl card for his boss and this was the perfect sketch to get it done!!!  Here's a look at what I came up with:


I had this Crate Paper that I also TOTALLY forgot about and finally pulled it out to use!!!  Seems like a trend around here!!!!  I followed the sketch quite literally, adding only minor changes.  I hand cut the tag, hand-colored the elephant with my Spectrum Noir markers,  and heat embossed "Congratulations"  using pink powder.   I finished it with ribbon, buttons, and a couple of flowers!!!!  That's it!!!  Easy Baby Girl card out the door :-)


Well gang... that's all for today!!! Stay tuned for some more exciting projects coming in the next few days!!!  Have a LUCKY day :-)


Saturday, July 27, 2013

Scrap Your Story DIY Challenge with Maggie Holmes!!!!

Hello gang!!!!  I know it's been a while but I have been out of town for the past week and just catching up on things.  My family and I went down to Fort Lauderdale to spend some well needed time away from home and with my Aunt and Uncle whom we love dearly!!!!  They were kind enough to have us AND the kiddies for the past week and deserve an award for their patience with us!!! Hahahahaha!!!!! Hope everyone has enjoyed their summer thus far :-)  

Any who.... I am writing in regards to a BRAND NEW DIY Challenge over at Scrap Your Story.  We were going to do this a week ago but unfortunately Christy, the site owner, has fell ill and needs some time to heal.  Our thoughts and prayers are with her and her family!  We've decided to go forward with the challenge with Christy cheering us from the sideline!!!!  

This week, the challenge is to CREATE YOUR OWN embellishment.  The girls have put together some FABULOUS ideas for you to learn the latest and greatest techniques for your pages!!!!  My DIY embellies are the ever-so-fabulous ROSETTES!!!!  They are super easy to make and add so much flavor to your pages!!!  And the best part?!?!?  You just use the same papers you're already working with to make them :-)

I've put together a step-by-step tutorial on how to get these done in a past post that includes a YouTube video if that will be of more help to you, but I will add the steps below as well.  
First, here is the layout I created making my very own rosettes.  I used a sketch by the wonderful Tabitha Triplett for the Twisted challenge over at Colorful Creations and Crate Paper's "Maggie Holmes Collection" (LOVE this line!!) to complete the page.  Here's a look:


Here's a close up of some of the rosettes.  As you can see, I cut them in half after making them to add a beautiful border to my picture!  I also added some K&Company brads to add a little detail :-)


For the page, I started by choosing papers that matched mine and my husband's outfits.  Just like a "girl" to do something like that!!!! Hahahaha!!! I used a Martha Stewart deep edge punch set to create the die-cut behind the photo.  Then, I just layered some papers, added the rosettes and grungepaper embellies,  threw on some ribbon, bling,  and liquid pearls, and called it a day!!!!  Don't those rosettes just make the page?!?!?   


Super Easy Rosette Tutorial! 
So, how do you make them you ask?!?  Well, it's SUPER easy and well worth the effort!!!  Here's what you'll need:
Necessary
12x12 paper (any kind)
Scoring Tool
Adhesive
Hot Glue Gun
Paper Scraps

Not Necessary
Paper Edge Punch(es)
Ink

First, you'll need to cut out some strips out of 12x12 paper that you want to use.  It HAS to be 12 inches in length for the rosette to form.  Depending on the size of the rosette, you'll want to cut your strips anywhere from 3/4inch (.75 inches) wide to one and a half inches wide(1.5inches).  Anything bigger or smaller will be too hard to work with.  Use your SCORING board and tool and score the strips at EVERY 1/4 inch.  To mae it easier in the long run, you should start on one side and score at every HALF inch (.5, 1, 1.5, 2,etc...), then flip it over and score at every 1/4 inch and 3/4 inch (.25 and .75).  This will make the accordion fold MUCH easier when you get to that step!
If you DO NOT HAVE a SCORING board, just use your paper trimmer and bone folder, or something similar.  When I don't feel like taking out my board that's what I do!!!!  

When you've completed the first step, you'll have a bunch of strips that look like this.. maybe more, maybe less.  You only need ONE strip per ROSETTE.  

For added detail, you can use your edge punches on some of the strips after you've scored them.  THIS IS NOT REQUIRED.  I'll show you the difference between them and the punches I used :-)

They should look like this when you're done punching.  

If you're an "inker" like myself, this is the perfect time to do your inking.  Just choose a side on the "non-punched" strips and ink the detailed side on the "punched" strips. These are the inks I choose:

Here's my heap of strips!!!  After you're done inking, go ahead and accordion fold the strips using the score lines.  This should be VERY easy!!!!

Now, use a little adhesive and bind your strips to make a circle (see below).  VERY IMPORTANT:  You MUST adhere the edges together keeping the SAME accordion fold pattern.  If it doesn't meet with the same pattern, just CUT one 1/4inch piece from ONE of the sides.  Then it should meet perfectly!!!!

Now, you'll need something to glue your rosette to when it's done.  This will be UNDER the rosette and NOT noticeable.  It doesn't have to be pretty... just big enough to keep it down and small enough to not be seen!!! I decided to use my 1inch circle punch and make circles.  You can use squares, strips, scraps, or anything else that floats your boat!!!  

Now, take your circle strip of paper and FLATTEN it!!!!!  Literally, just squish it down in the center while it's standing and it should form your rosette.  You can squeeze it tight for a "tighter" looking rosette, or lightly for a more "relaxed" look.  I usually go tighter!!!  Using your HOT GLUE GUN, place a little hot glue on the piece you cut for your base.  This would be my circles.  Now, take your rosette and CAREFULLY place it down atop the base while the glue is hot.  You must work rather quickly here!!!!  Hold the rosette in place on the base for about 30 seconds, or until the glue is cool enough to hold it.  That's it!!!! YOU'RE DONE!!!!!  
Here's a look at my rosettes:  You can see the difference between the "fancy" edge ones and the regular ones.  I actually like the look of BOTH!!!!!

Pretty cool, right?!?   Now, you can embellish as desired!!! I usually like to add a brad to the center of mine, but you can add buttons or anything else that looks good!!!  You can also "stack" them for added detail like this:


Tim Holtz Grungepaper Fun!
As an added "bonus" (hahahaha!!!),  I also want to show you the versatility of GRUNGEPAPER!!!!!!!  I absolutely LOVE grungepaper.. it's SOOOOOO much fun to play with!!!!!  
I used various stamps and stamped on the "smooth" side of the paper using embossing ink.    

Then, I used different color embossing powders and heated it up!!!!  Here's a look at them after I cut them out:


Isn't that neat?!?  And SOOOOO easy?!?  I added a little fun to my hearts using the Broken China Distress Marker by Tim Holtz.  He's my fav!!!!!

And the other heart I made... 


Well gang.... Thanks soooo much for stopping in.  Have a LUCKY day :-)


Friday, July 12, 2013

Summer Fresh and in Love!

Happy Friday gang!!! Another week has passed us by in the blink of an eye!!!!  

I'm here today to share with you a couple of things: Scrap Your Story's new weekly challenge and a totally "Summer Fresh" page!!!!

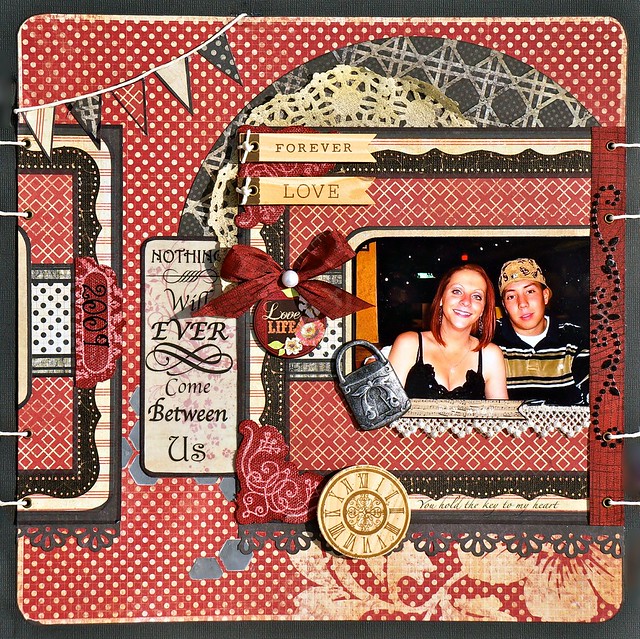
Between Us with Color Bok
First, since today is Friday, we know that means another fabulous challenge over at Scrap Your Story!  This week, a sketch... And a beautiful one at that!!! Here's a look:

I just bought some Color Bok paper on sale and wanted to give it some play time!!! Here's what I came up with:


This is me and my husband on the evening he proposed to me!!!  He took me back to the place where we had our first date, got down on one knee, and popped the question!!!!  

Any who, I tweaked this quite a bit... I just kept playing and playing but the "base" is still there!!!!  
I started by matting my photo, over and over again.  I used some of my Martha Stewart punches to create detailed edges, and, of course, outlined everything with a Black Sharpie marker!  I cut my finished matted product on the side, then attached to the opposite side of the paper.  I added a few eyelets and strung some hemp cord through them.  
I also put my Aged Mahogany distress stain to work on some Tim Holtz Crinkle Ribbon and Prima Resist Canvas.  I used a journaling stamp to add detail to the Crinkle Ribbon as well.  I finished it with a couple of wooden embellies by The Little Yellow Bicycle, ribbon by Recollections, and various other things.  It actually turned out better than I had hoped for :-)

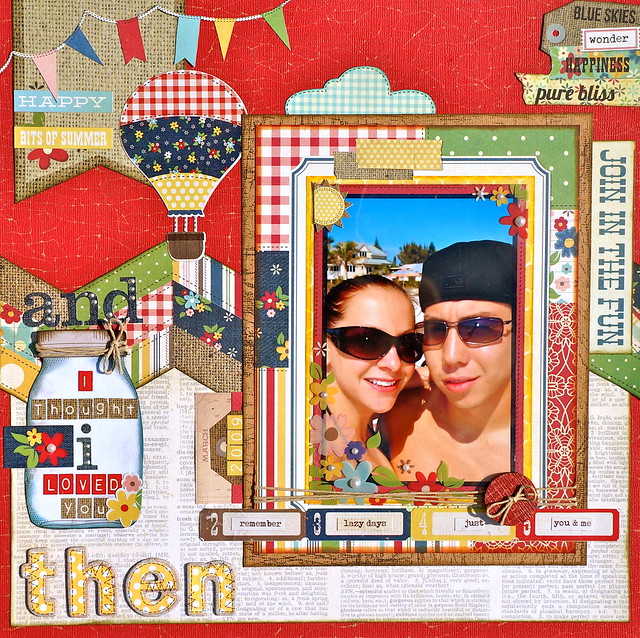
Then with Simple Stories Summer Fresh
Next on the list... Simple Stories Summer Fresh line!!! One of my all time FAVS!!!!!!
I wanted to enter Tammy's "Country Song" challenge over at 2 Broke Girls where the title of your page must be a Country Song.  AWESOME!!!!!  The song my husband and I danced to at our wedding for our first dance is called "Then", by Brad Paisley (LOVE him!!!!).  It's "our" song!!!!  
Any way, since the theme was country, I wanted to do just that with my page.  Make it look a little country.  And what better line than this!!!  
I started by using Sketch #1 over at Sketches4All.  Here it is:


PERFECT!!!!!!  And here's my layout:


I just LOVE it!!!!  

I started by using some "kraft" distress paper for the background.  Then layered up a couple of papers from the Summer Fresh line.  I matted the photo using a mat from the collection, and some kraft paper that I stamped on with a distressed stamp to coordinate with the bg.  I cut out some die-cuts from some of the papers and added sticker die-cuts as well.  The jar is from the Dear Lizzy Neapolitan paper collection.  I cut it out, added my letters and Faded Jeans distress ink, then coated it with a thin layer of matte Mod Podge to seal it in.  Isn't it lovely?!?  I think it's just PERFECT for the title!!!!!  

Well, gang... Thanks so much for stopping in.  Have a LUCKY day!!!!