June 2014

June 2014
Showing posts with label authentique. Show all posts

Saturday, November 1, 2014

So Thankful for Family with Creative Embellishments!

Hello everyone!!!  We are already in November (which means Christmas is literally right around the corner) and I am so enjoying this cooler weather! 

I'm here today with a scrapbook layout I created for the NEW November Challenge posted at Creative Embellishments!
Here's this month's inspiration photo:

Oh, how I truly LOVE the colors of Autumn!!  I recently did some "pumpkin painting" with the girls which created the perfect picture for the above photo!!!
Here's my page:

Yes, I know, my girls are beautiful!!!  Yes, I toot my own horn frequently when it comes to my girls.... They are my WORLD!!!!!
I used papers and embellies from the Garden of Abundance kit and We Are Family kit from the Frosted Designs Store.
I started my page by creating my background using a Prima "Rattan" 12x12 stencil and some molding paste.  I kept it pretty simple as the paper does most of the work here!  I added some of the "rings for so many things" from the CE Store which were colored using distress inks and Luminarte Silks Acrylic glazes.


I applied the same technique to the Ivy Wreath, coating it with distress crackle paint for a glazed over look, then using it as a frame for my pic!

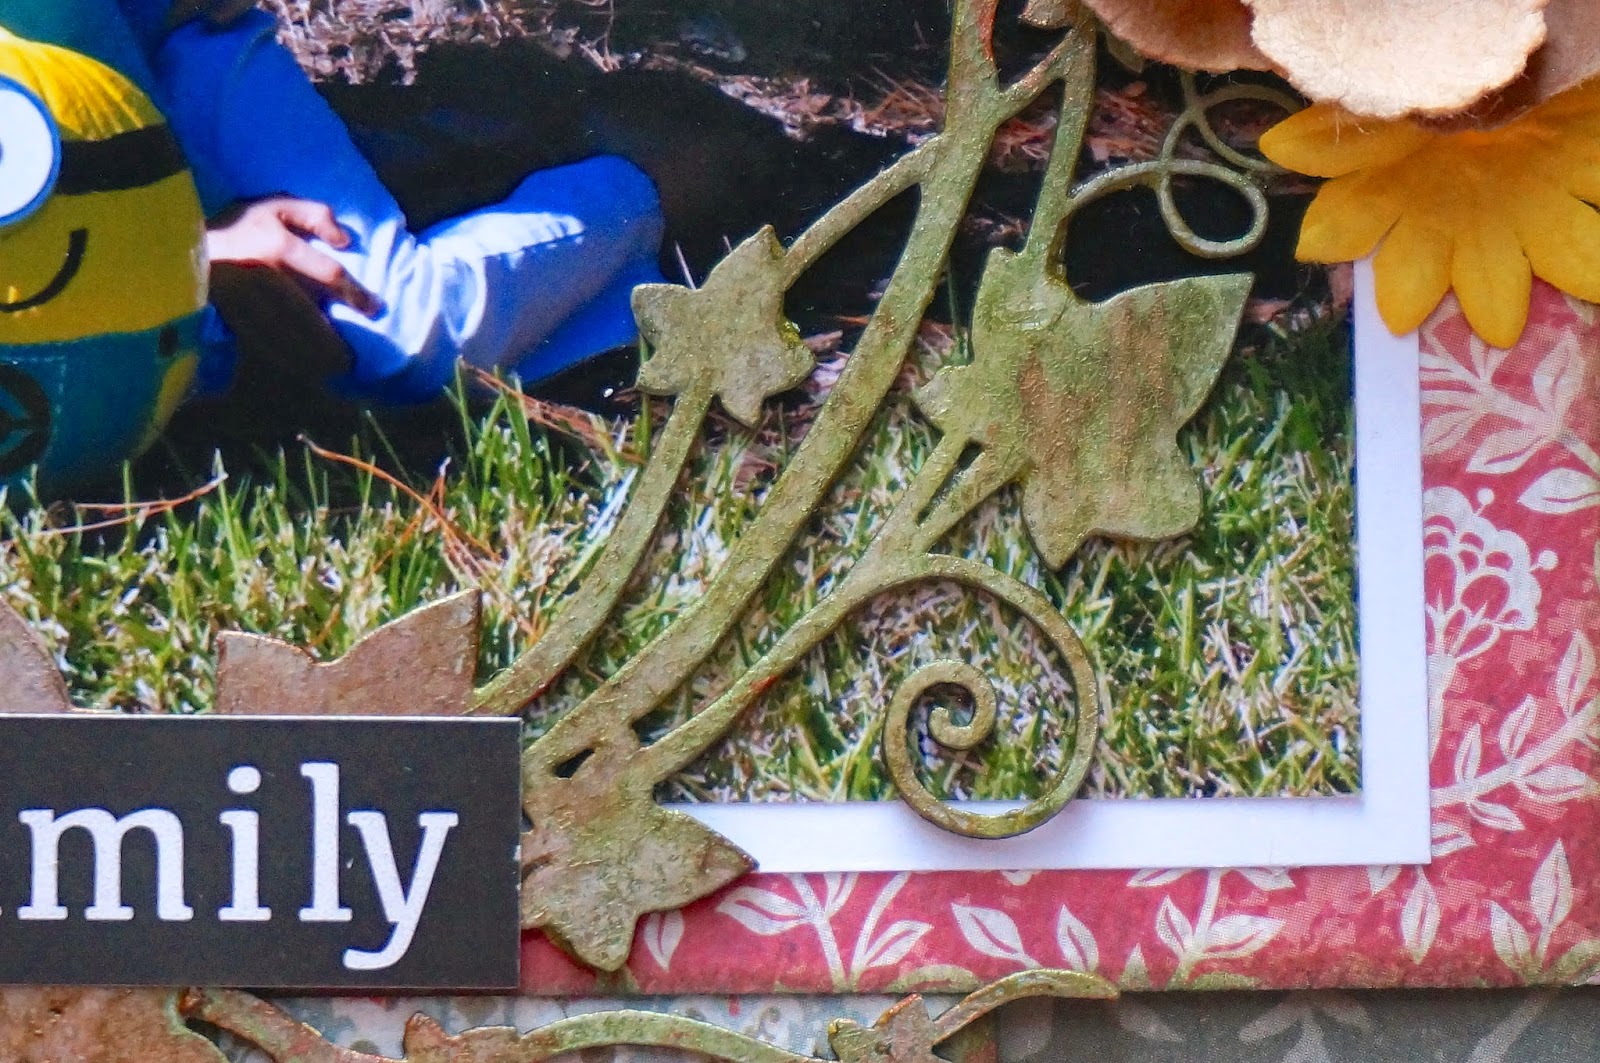
I finished the page with some flower clusters and stickers!


Well gang...  Thanks so much for stopping in and have a LUCKY day :-)

 photo 84c064ac-ab01-4e94-bb12-3b3893d8f8eb_zpsabe08004.png

Tuesday, October 21, 2014

Tutorial Tuesday with Frosted Design's Garden of Abundance Kit!

Hello fellow crafters!!!  I'm up on the Frosted Design's Blog today with a tutorial for a mixed media card!  Let's take a look, shall we?!?

I used this month's Garden of Abundance Kit which was designed by yours truly!  Here's my finished card:


I used the current sketch #109 over at Cardabilities by the ever-so-talented Karen Gerber:

Now, here's a look at how I made this cad in just a few simple steps!
 First, grab the papers you want to use and measure them to size (4.75x6.75 here to mount on 5x7 card base).  Add some texture using your favorite stencil and molding paste or something similar.  Ink the edges with the lighter ink in the kit, making sure to come in some on the actual card.  Finish the edges with black ink.  


Ink the edges of your outer piece, then use a distress tool around all the edges!  Grab some chipboard (flourish 18 used here from the Creative Embellishments Store) and color it with your favorite mediums! Layer it all on your card base and embellish as desired :-)

See how easy that is?!?  Here are some close-ups:


And here is another card I created this month's fabulous kit!  Details for this one can be found here!!!


Well gang...  Thanks so much for stopping in and have a LUCKY day :-)

Sunday, October 5, 2014

Garden of Abundance Layout and New Kit Challenge!!!!

Hey there crafters!!!  Happy October!!!!  We are here again with another fabulous kit (designed by yours truly!) and a layout to showcase all the wonderfull-ness included this month!

Here's a look at the kit:

Authentique's "Harmony" collection is featured in the kit as well as goodies from Prima, Fabscraps, Kaisercraft, and more!

The colors in the kit were perfect for a photo of me and my sister at my wedding a few years back.  Here's a look:

The blue in her dress just makes the photo pop!
Here are some close-ups using other goodies from the kit:

 
 (I used the background stamp to add some detail to my page and the ink included to color my wooden and chipboard pieces!  LOVING those butterflies as well!)


 -I also used tons of goodies from past kits (like the blue Prima wire, burlap flower, metal findings, and Lindy's yellow embossing powder for the bird cage!).


 I finished the page with one of the beautiful Prima burlap flowers included and some other "found" objects!

What will YOU create?!?!?

Our kit challenge is simple...  All you need to do is create a project, ANY TYPE OF PROJECT, using ANY past or present FD kits and submit below!  You'll be entered to win a fabulous prize!

Scrapmatts is providing a $30.00 prize package to one lucky winner!!!!!!!!!!!  So get to it gang!!!! 


 You have until noon on October 31st to submit your entries!!


Products used from the Frosted Designs Store:

Friday, September 5, 2014

We Are Family Altered Burlap Panel!!!

Hello everyone and Happy Friday!!!!  Can you believe it's already September?!?  A new month, a new kit, and a NEW challenge!!!!

Here's a look at this month's AMAZING kit:

This picture really does not do this kit justice!!!  When I opened the box and saw all these beautiful colors, I was in awe!!!!  I purchased some burlap panels a while back and decided to finally get them out and blow off the dust!!!  I've stayed away from them merely because burlap is not the easiest to work with, in my opinion.  But I love these papers and embellies and wanted to make a wall hanging with them so burlap it was!

Here's a look at my finished piece:


I did a little step-by-step tutorial for the background of my panels to help out the next person who may want to give this a shot!  I learned a few things along the way so I thought I'd share my process :-)
I started by adding some gesso around the panels which was a bit difficult!  I tried a foam brush, a dobber, and finally decided my finger was the best way to get the job done! 

I grabbed the mixed media ink from the kit (LOVE!!!!) and applied it directly to areas around the panels.  This ink is nice and wet and goes on very smoothly to any surface I've tried so far!

I used a layering stencil and distress ink to add some depth...

then I used the layering stencil in the kit with molding paste to add some texture!


I took the Stamper's Big Brush Pen (love these pens!!!) and outlined the die-cuts I wanted on my panel.  You have to be VERY careful doing this as a light touch is needed or you will draw on your embellishment, instead of just outlining it!  I've had a lot of practice using this technique with permanent markers and have always loved the defined look it adds to any piece!


Then, the fun part...  I went to work embellishing!!!  This kit is full of beautiful die-cuts, wooden and metal embellishments, enamel dots and more!  It was fun to put it all together for this piece! 


And there you have it!!!  A beautiful piece to fill in some white space on my walls, made with only a few bits and pieces from this AMAZING kit!!!!  Stay tuned for the second panel!!!!!!!!!!

Now it's your turn!!!!!!  Submit your projects using ANY Frosted Designs Kits (past or present) to be entered into our monthly drawing!  One random winner will be selected to win a fabulous prize!!!  This month's sponsor is:


 Dies R Us is providing a $10.00 gift certificate to their online store FULL of fabulous dies for every machine!!!!!!!!!!!!!!


You have until noon on September 30th to upload your entries!!!!  WHAT ARE YOU WAITING FOR?!?!?  Happy Scrapping :-)

Products from the Frosted Designs Store:


Wednesday, August 20, 2014

**Thrilled** to be Guest Designer at Scrap Around the World!!!!!!!!!!!

Hello friends!!!  I am here today with some very exciting news....  I was asked to be Guest Designer over at Scrap Around the World this month!!!!!!  Can you believe it?!?  I am still in disbelief!  Hahahaha!!!!

"Be Your Own Kind of Beautiful" with Authentique "Flourish" Collection
I was asked to create something fabulous (of course!) using the following moodboard:


Like all of their moodboards, this is absolutely amazing!!!  I love the colors, the pop of gold,  the stems/posts in the shoes, and well, everything!

So without further ado, here is my page:


This is an older picture of my daughter taken a few years back.  She was so perfectly posed for the pictures!!!  
To start my page, I grabbed a pice of white Bazzil cardstock and started to "build my page".  I used various gelatos, stencils with molding paste, mists, sprays, stamps, etc.  I wanted to mimic the stems/posts in the shoes shown in the inspiration photo, so I tried (my hardest) to make semi-straight lines across the page with my gelatos.  I used a bit of water to get them to blend a bit better. After everything dried, I went to work embellishing!  I added strips of paper (also to mimic the "lines") across the page, simply tearing them as I went along.


I used a gold and pink gelato to color my chipboard pieces from 2 Crafty Chipboard (Thank you SATW and 2 Crafty for my fabulous prize!!!).  I also added some liquid pearls around them for accents!  I used various flowers from my stash to add detail around my photograph.  The resin pieces are from this month's kit over at Frosted Designs and went beautifully with this page!


I finished the page with a title chipboard piece which was coated with gesso, then colored with the pink and gold gelatos, and misted with Lindy's starburst sprays!


Well gang... Thanks soooo much for stopping in and have a LUCKY day :-)

 photo 84c064ac-ab01-4e94-bb12-3b3893d8f8eb_zpsabe08004.png

Friday, March 21, 2014

Frosted Designs "Favorite Things" Blog Hop!!!


Hello crafty friends and welcome to the Frosted Designs "Favorite Things" Blog Hop!!! As most of you know, March is National Craft Month!!! What better way to celebrate our favorite time of year than with a "favorite things" blog hop?!? We are so excited about all the fabulous items in store that we wanted to share with you how we use them on our projects! Our Design Team has put together some AMAZING projects just for your viewing pleasure :-)

If you've arrived here from Anita's blog, then you're in the right place!  If not, please start the hop at the Frosted Designs Blog here!

We have some fabulous prizes up for grabs from the following sponsors:


Now to show you MY favorite things!!!! 
 I LOVE using the Lindy's Stamp Gang Starburst Sprays from Frosted Designs!!!  They are truly sooo much fun to work with!!!!  So, I created a a page to show you that mists are NOT just for you paper!!!!  I also used the March Sketch challenge over at Creative Embellishments (inspired by the floating petals to the left of their inspiration page!), AS WELL as some of their FABULOUS chipboard on my page!
Here's a look:


I started with the Authentique "Flourish" Collection in the store and some layering.  I used the Circle Template (Another one of my FAVS!) and some of the sprays, as well as various inks, to create the background.  I added some layers of gesso over areas for a more "muted" tone.  Then, I used the Tim Holtz "Dot Fade" stencil from last month's kit and some molding paste colored with Lindy's Magicals to finish my background effects!


I layered on tons of flowers and embellishments, applying gesso and the mists for added color!  The round metal buttons were coated with gesso, then misted with LSG sprays until I achieved my desired colors!


I added Creative Embellishments chipboard behind my photo mats that was embossed with the Tim Holtz Black distress powder in this month's kit!


I finished with some chipboard by 7 Gypsies that I clear embossed with a polka dot stamp by Stampin Up! and some versamark ink.  I coated it generously with Lindy's Mist for a beautiful, rich teal color!!!!!


Now, I ALSO have a GIVEAWAY here for you lucky crafters!!!!  


I have put together some crafting goodies that will be mailed to one lucky person  (Anywhere in the world!)!!!  All you have to do is BECOME A FOLLOWER of my Blog AND leave me comment letting me know you've stopped by!!!  That's it!!!!

And don't forget to jot down each member's scrambled FD product and email it to Brandimatos@gmail.com for your chance to win a $20.00 Gift Certificate to the Frosted Designs Store!!!!!
My scrambled word for you is MPAEETLT (HINT*** It's located under "Mixed Media" in the FD store here!!!!! 


Thanks for stopping in gang and have a LUCKY day :-)

You're next stop is over at Brenda's Blog!!!  Have fun hopping :-)

Here is the Blog Line-Up in case you get lost:

Brandi (You Are Here!)