June 2014

June 2014
Showing posts with label layering stencil. Show all posts

Sunday, February 1, 2015

Things I Love with for Creative Embellishments with Romance Novel, Chapter 2!!!

Hello all and welcome to a new month!  February is here which means a month full of all the things I love!!!

Today is the 1st which means a new challenge over at Creative Embellishments!
Here's a look at the inspiration photo: (The twist this month is to use an ombre effect on your chipboard/ create a background!)

My two girls are on the top of my list for things I love so it's no surprise I would use a photo of one of them!  
Here's my page:


I used the "Forever Yours" kit from Frosted Designs to create the page and a variety of CE goodies!
I created my background with various stencils, molding paste, gelatos, and Lindy's magicals until I achieved my desired effect!

I added some stamping with the Distressed Checkered Stamp with black distress ink!

I love flourishes and added one from the Flourish 22 set, adding my ombre effect with a number of different gelatos!

I layered on tons of papers, distressing them along the way, and added some liquid pearls for accents!  I finished with a flower cluster and a wooden heart from the Hearts set, adding another ombre effect to that one as well!


Well gang...  Thanks so much for stopping in and have a LUCKY day :-)


Thursday, November 20, 2014

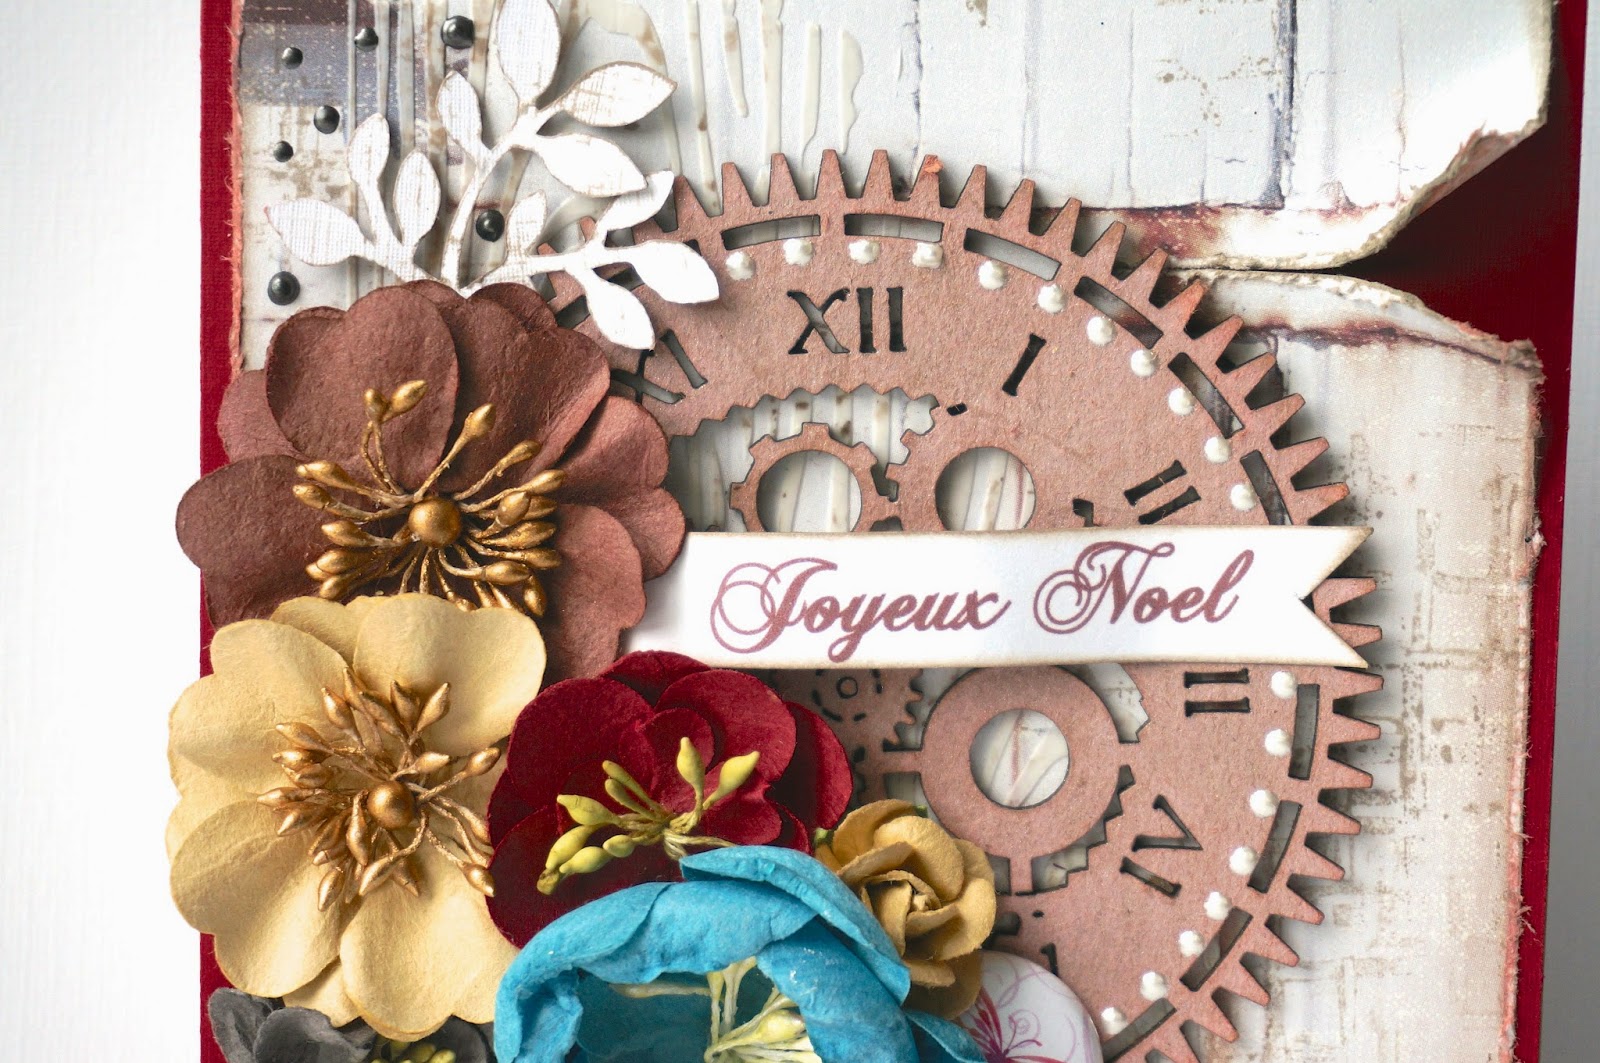
Joyeux Noel for Creative Embellishments!!!

Hello again crafters!!! I don't know about you but the weather here has certainly taken a dip... Cold air is moving in which means winter (and one of my FAV holidays!!!) is right around the corner!!

Today I am sharing a Christmas card I made using some wonderful Creative Embellishment goodies and sketch #111 over at Cardabilities:


Here's a look:


I used this month's Rustic Beauty kit from Frosted Designs (designed by yours truly!!) to create the card.

I first created the background by adding some molding paste through a layering stencil, then doing some "second generation" stamping with the "Distressed Burlap" stamp.


As you can see, the Steampunk Clock is the "main attraction" here on the card. I colored it using some mixed media ink and shimmer mist, then layered up various flowers and die-cuts.


I was also able to sneak in one of the butterfly flair pieces (these make GREAT fillers for ANY cluster!!!) to finish off the card!


Well gang.. Thanks so much for stopping in! Have a LUCKY day :-)


Thursday, October 16, 2014

Handmade Sympathy Card for Creative Embellishments!

Hello there fellow crafters!!! It appears the "Fall Season" is well underway in most of the U.S. with beautiful hues shining through on almost everyone's favorite social media pics. I, however, reside in the Sunshine State where Fall is simply a made up term as we only have two seasons: Spring and Summer! Hahahahaha!!! So, I used this month's inspiration photo over at Creative Embellishments as a starting point to create a sympathy card for a friend in need, grabbing the beautiful hues in the picture to make up my card!

Here's another look at this month's inspiration pic:


I truly love the colors in this pic which is very apparent with my project.  I completed the card using this month's Garden of Abundance kit from Frosted Designs!


I also distressed the edges of my card with a distress tool and some ink as part of this month's challenge! 

Here are some close-ups of the yummy chipboard pieces I used on this project:
First I created a background with the Binary background stamp and black distress ink.  I also used my Tim Holtz layering stencil with molding paste for some background texture.


I painted the Flourish 18 with some Luminarte Paint from my stash, then added a coat of crackle paint for texture (yes, this is my FAV technique right now!!!).


I grabbed flowers and embellishments from this month's and previous month's FD kits to dress it up a bit!


Finally, I added various sized hexagons which were painted with brown distress paint and inked over with black distress ink.


Well gang... Thanks so much for stopping in and have a LUCKY day :-)

Sunday, June 15, 2014

Mid Month Sketch at Colorful Creations with Prima's Time Traveler Collection!!!

Hello all!!!  It has been a bit crazy around here the past few weeks but I am hoping to get back in the swing of things soon!  

It's officially mid-month which means another sketch over at Colorful Creations!!  
Here's a look at the sketch:


I decided to combine this week with this month's mood board at Scrap Around The World!  


Isn't it fabulous?!?  I've been wanting to do a page with these colors for some time so this was the perfect opportunity to do so!!!
I was inspired not only by the colors, but by the flowers, the texture of the paved road, and also those round, yellow bicycle wheels!!!  I just had to add my circular chipboard piece from Creative Embellishments to represent the wheels on the bike!
Any who... Here's my page:


I really like these colors together... They are perfect for a masculine page!
As you can see, I used papers from the "Capture the Moment" June kit from Frosted Designs!  This kit features papers and embellies from Prima's "Time Traveler" collection as well as goodies from Ranger, Maya Road, and other major manufacturers!!! I've said it a hundred times before but these kits are so wonderful and versatile...  You can make girly pages, masculine pages, off the page projects and so much more!!!

So any who... Back to the layout!!  Hahaha!!! I started the page with one of the Time Travelers papers as my background, then added white Bazzil cardstock on top so that I could "build the page" myself!  I used various Tim Holtz layering stencils, along with inks, mists, gelatos, and molding paste to add some texture and depth to my background.

 
I grabbed a couple of stamps and my Faber Castell big brush pen to create more depth and add designs to the paper!


I've been wanting to use this circular chipboard piece for some time and knew I just had to add it on this page!!!  I coated it with gesso, then added yellow and black gelatos randomly to achieve my desired color.  I sprayed some Lindy's Glitz Spritz for some shine, then topped it off with liquid pearls and enamel accents!
 

I added various embellishments, most coated with some form of inks or sprays to match my layout, including wood veneers and chipboard arrows by Heidi Swapp.
 
 
I finished my page with a title from Creative Embellishments that was given the same treatment as the other main piece! 

 
I'm glad I gave this color combo a whirl, I am truly happy with the end result!!!
 
 
Well gang...  Thanks so much for stopping in and have a LUCKY day :-)
 photo 84c064ac-ab01-4e94-bb12-3b3893d8f8eb_zpsabe08004.png

Friday, May 23, 2014

New Friday Challenge posted at Frosted Designs!!!

Hello again my crafty friends!!!  I'm back today to share a card I made for the new Friday Challenge over at Frosted Designs!!!  

Your challenge is to use STARS and STRIPES on your project!!!  Any type of project is acceptable!!!  Cards, layouts, ATC's, mixed media, etc.  GET CREATIVE!!!!

I know you're probably all sick of seeing the Simple Stories "Homespun" collection from the Frosted Designs Store...  But I just can't leave it alone!!!!  Hahahaha!!!!!  So yes...  I have yet another project with this set :-)
Here's a card I made for the challenge:


LOVE how this card came out!!!!  And I love the bright, bold colors in this line!!  Amazing!!
I started my card with the "Rays" layering stencil by Tim Holtz and some molding paste.  I mixed the paste with Butterscotch Alcohol Ink until I achieved my desired color.  Then I applied it over the stencil on white Coordinations cardstock.


After that was dry, I layered on other papers that were first inked with Walnut Stain Distress Ink.  I grabbed one of the quote cards with the set and matted it on Neenah Kraft and inked the edges.  I used my Crop A Dile to punch holes in the chipboard heart and tie some paper string through it!


Now, all I needed to do was add some stars!!  I'm addicted to these wood veneers...  I have so many different types and styles and they are my go-to embellishment when I want to add just a little something to my project!  These are by Studio Calico and come in various sizes!  I sprinkled a couple on my card and glued them on!


There you have it!!  Stars and stripes and molding paste, oh my!!!  


Well gang...  Thanks so much for stopping in and have a LUCKY day :-)


 photo 84c064ac-ab01-4e94-bb12-3b3893d8f8eb_zpsabe08004.png

Saturday, March 1, 2014

March 1st Challenge at Colorful Creations!!!

Hello all and happy Saturday!!!!  Such a busy week around here...  Ready for this weekend!!!

"Treasure" Layout using Authentique "Flourish" and Suave" Collections
Today, we welcome a new month, and a new challenge over at Colorful Creations!  This challenge is an inspiration challenge with a twist...  Here is the inspiration photo:


The twist?!??  To use the word LUCKY on your layout.  (Well everyone knows how much I LOVE that word, right!??!?  Hahahaha!!!!!)

And here is my layout:


I am really loving the new Authentique paper lines!!!  The paper is fabulous and the colors are just gorgeous :-)  They are also included in the March Kit from Frosted Designs (which I used to make this page)!!!!!

I used a black background paper from the kit and added a little detail in various areas.  I used the Tim Holtz layering stencil (clocks) and some molding paste tinted with Lindy's Stamp Gang "Magicals" to add some texture to the page.  I also used the white gel pen from last month's kit to create the "faux" stitched border around the clock.  The kit comes with fabulous Kaisercraft wooden butterflies and I just had to have one on this page!  I first stamped one of the Prima Stamps in the kit directly onto the wood using Versamark ink, then heat embossed it to create a resist.  I colored it with the African Jade Luminarte Paint included in the kit and some LSG Sunburst Sprays.  I topped off the butterfly with gold Perfect Pearls (by Ranger) to tie in the gold from the inspiration photo.  


I created small clusters of flowers by Prima and Kaisercraft, applying Gesso to the tops of some of them.  I also found these fabulous chipboard pieces from Creative Embellishments that were coated with gesso as well.  


I used the tiny sticker letters from the kit to add the word "Lucky" on the side of my picture.  


I finished off the page with the Kaisercraft rub-ons and black brads from the kit as well.  I sponged the trim from the kit with the Luminarte Paint mentioned above and placed it below the title.


And there's my completed page!!!  Thanks for looking :-)


Well gang...  Thanks so much for stopping in and have a LUCKY day :-)