June 2014

June 2014
Showing posts with label Sketches4All. Show all posts

Sunday, February 2, 2014

Love is in the Air at Sketches4All!!!

Hello again all!!!  It's the beginning of a new month and new week, and that means lots of new challenges and inspiration projects!!!

For the month of February, Sketches4All is having a "Love is in the air" mini-crop in their forum!!!  Stop by and check it out... There are tons of different challenges, prizes, and inspiration to be seen!!!

My challenge is "anything but a card or a layout" for Valentine's day!!!  This can be ANY TYPE of project, so long as it's not a page or card.  Easy enough, right?!?  

I made an altered tag using various techniques.  
Here's a look:


I started with a standard #8 tag and applied a thick coat of gesso on top.  After drying, I misted several Lindy's Stamp Gand "Starburst" mists to add some color and shimmer!  I used black StazOn ink and a cursive print stamp to create the effect on the left side of the tag.  Then, I cut a stencil on my Cricut Expression 2 using the "Edge to Edge" cartridge and applied a thin layer of molding paste over it.  I went over the design with various Luminarte Silks Acrylic Glazes for a bit more color.


I also added a chipboard birdcage by Blue Fern Studios that was stamped with Versamark, then clear embossed.  I sprayed it with white "Dylusions" mist and let it dry.


I finished the tag with a couple of rub-ons and various flowers by Kaisercraft, Heidi Swapp, and Petaloo.  I topped several of the flowers with mist, then a thin coat of gesso for a more distressed look!  I added liquid pearls around the edges and a double bow with a black pearl to to the top!


Well gang... Thanks soooo much for stopping in and have a LUCKY day :-)


Saturday, February 1, 2014

Love You More for Colorful Creations "Inspired" Challenge Reveal!!!

Afternoon all and happy Saturday!!!  It's starting to warm up around here although the rain has left it quite muggy!!


"Love You More" with Crate Paper "Valentine's" Collection
Colorful Creations has a brand new challenge posted!!!  This week, it's an inspired" challenge.  You may draw any inspiration from the below photo to create your layout:


I chose the colors and all those pretty hearts and also used this sketch from the Sketches4All DT monthly challenge for February:


And here is my page:


I had this Crate Paper "Valentine's" line lying around and put it to use!!!
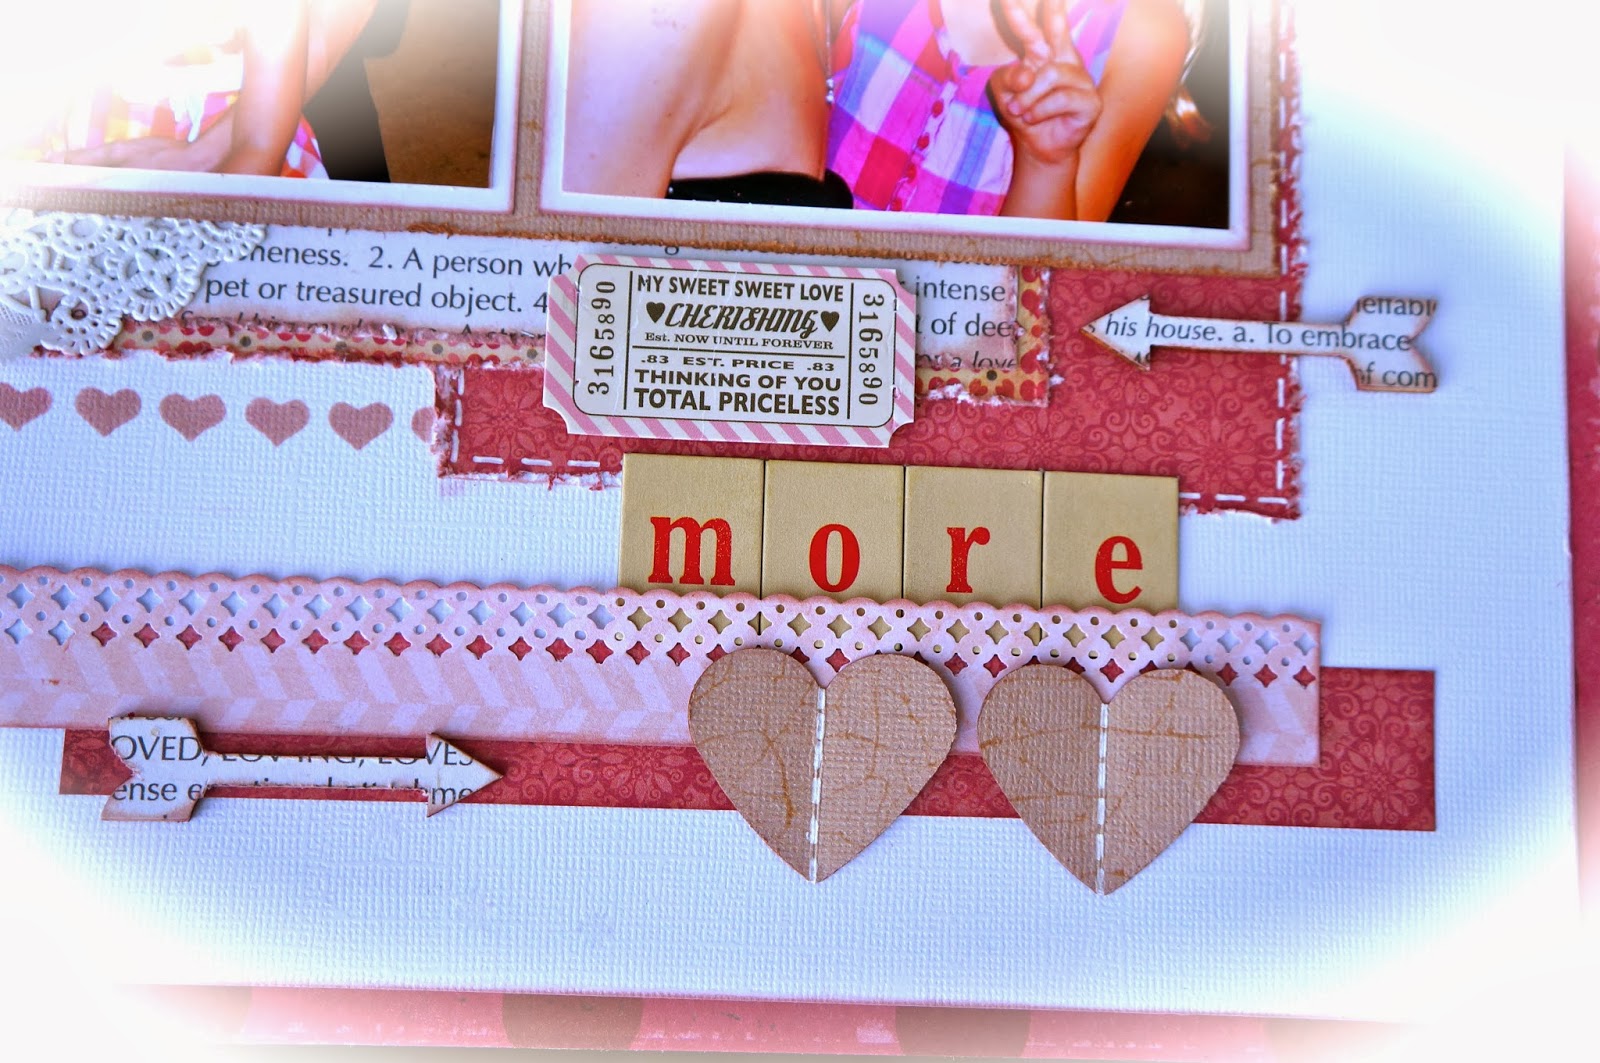
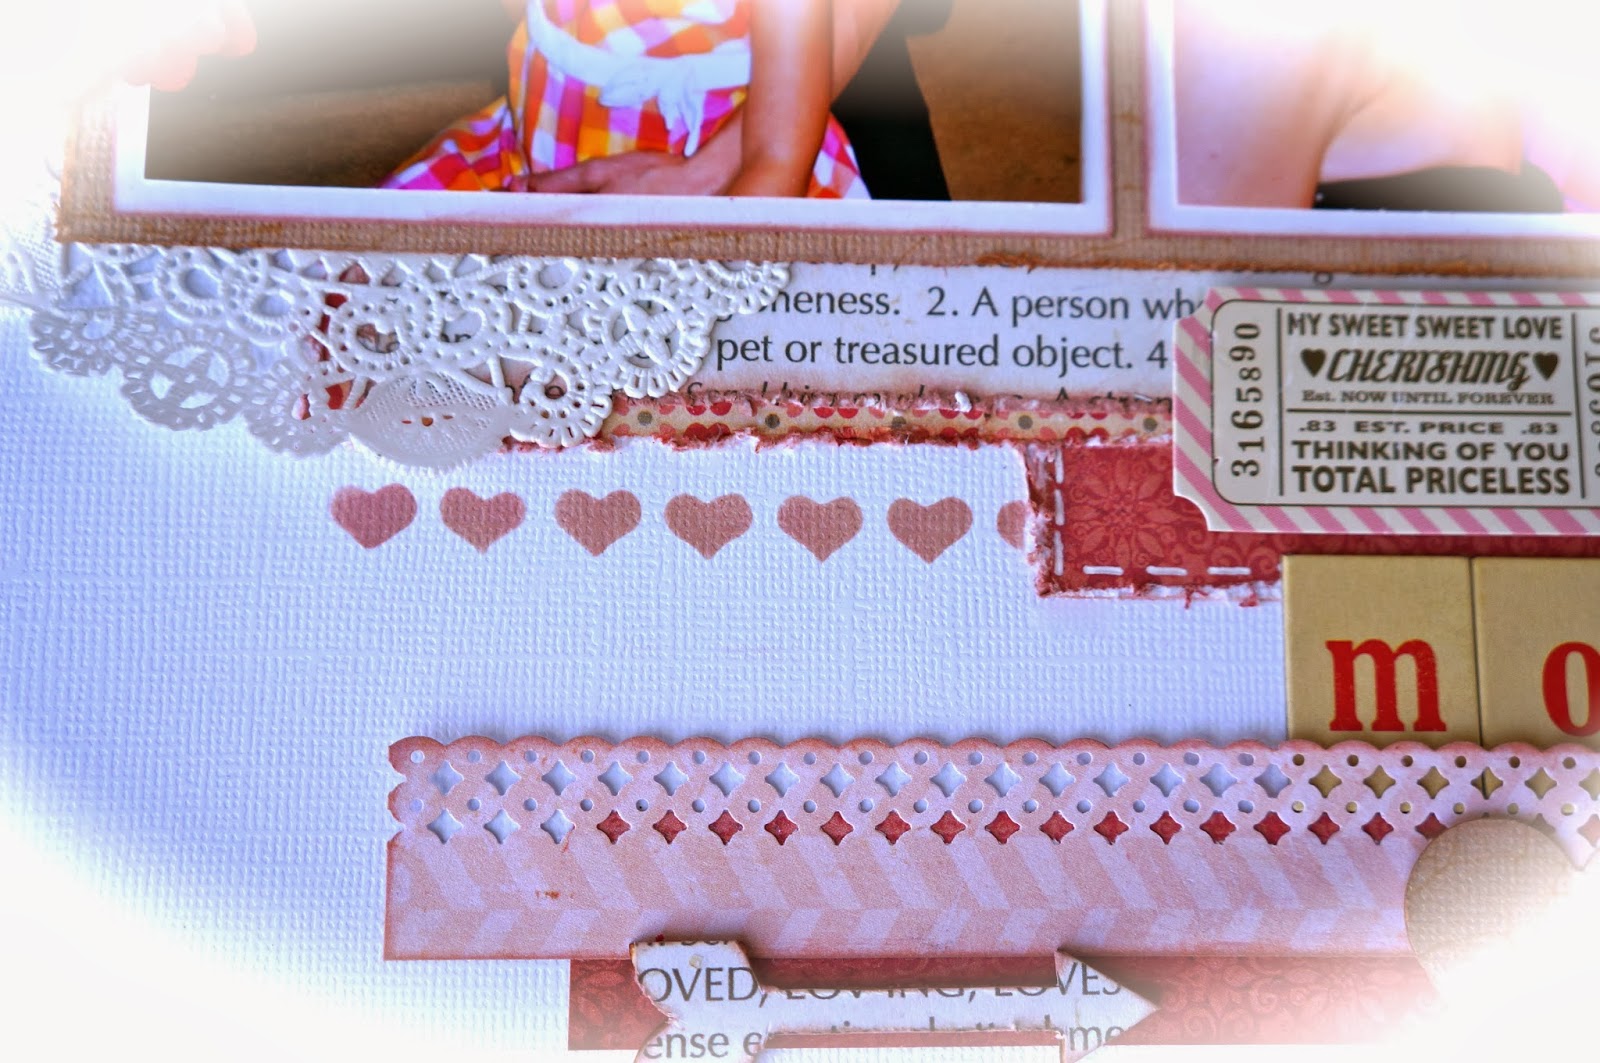
I moved the sketch to the middle of the page to accommodate both of my photos.  I did some paper distressing with a tool, then went over it with a little distress ink for contrast against the white background.  


I also added some punched hearts with "faux" stitching down the center with a white Gelly Roll pen.  I have these amazing wood cut pieces by Studio Calico that I added, some left bare ("Love You" and small heart) and added coordinating paper to the arrows!!!


I used a heart mask and distress ink for small hearts under the pics!
I finished with flowers by Recollections and a couple of embellies from the Pink Paislee "Secret Crush" paper collection!!!  

Well gang...  Thanks so much for stopping in and have a LUCKY day :-)


Saturday, January 11, 2014

Let's Get Sketchy with Sketches4All Winter Wonderland Challenge!!!

Hello everyone and HAPPY FRIDAY!!!! A little late I know... But I hope you enjoy your weekend all the same :-)

"Merry and Bright" with Pink Paislee "Noel" Paper Pad
Today I'm sharing with you a layout I recently created for the Let's Get Sketchy January Week 1 Sketch.  I am also combing this with the Sketches4All Winter Wonderland challenge where Anything goes so long as it meets the theme criteria and the following photo for inspiration:

Here's a look at the fabulous sketch by Brenshevia:


And here is my "Winter Wonderland" Layout:


I absolutely LOVE this sketch and the Pink Paislee "Noel" paper pad together!!!  It was actually a pretty simple page, only dressing it with a few embellishments and putting my punches to work! This is a photo of me and my husband on Christmas Day last year :-)
I started by outlining most of the papers and photo with a Silver Sharpie marker, then used a shimmery silver background paper to add the silver from the inspiration photo.  
I used a craft knife and a ruler to make the large "chevrons", outlining them also to make them stand out.  I finished it with chipboard by Studio Calico and Blue Fern studios, inking and embossing on the larger pieces.
Here are a couple of close-ups:


Well gang...  Thanks soooo much for stopping in and have a LUCKY day :-)


Monday, December 2, 2013

Sketches4All Jingle Bells Blog Hop Begins!!!

Happy Tuesday everyone!!!! Are you ready for another Holiday Hop?!?  This one is brought to you by Sketches4All!!!! 

Welcome to the Sketches4all


So glad you could join us for our blog hop!  You will have nine days to hop around and to complete any and all of the challenges that will be offered by each design team member.  We hope to inspire you this holiday season!  The Hop starts today, December 3rd and ends on December 9th at midnight (PST).  Winners will be announced on December 13th in the Winner's Circle at Sketches4all

There are TONS of prizes to be won!!! One lucky winner will receive the Grand Prize which is this glorious November Kit from Frosted Designs!!! Look at all of the gorgeousness!


There will also be a second place winner of a $20 gift certificate to the Cutting Cafe!


AND...each Design Team member will offer a challenge here at Sketches4all, some with an individual prize!

So how do you participate??

1. Hop around to all of the blog's of the design team members. Follow them and leave a comment. 
(Right away, that will get your name in the hat to win the second place prize!!) 

2. Join the Design Team's Jingle Bells Blog Hop challenges at Sketches4all
These challenges will be posted in the Forum under Special Events. (HERE) 
 (This will get your name thrown in the hat to win the individual prizes.)

3. And... to win the Grand Prize... you will need to complete the hop AND find our mystery sentence!!!

Each Design team member will have a word hidden on their blog. When you collect all eight words you will have found our mystery sentence. After you find it, you will then just personal message it to FIA at Sketches4all. 

That's it! Just complete the blog hop and find the mystery sentence and your name will be in the hat to win that awesome kit from Frosted Designs!!!


Now for a little inspiration and a challenge to give your creative mojo a boost!!!  Since we are in the "month of giving", I decided on a very simple challenge...  All you have to do is create a holiday project that IS NOT a card OR a layout!!!!  This can be a tag, altered pieces, altered picture frames, ATC's, etc... GET CREATIVE!!!!  

I chose to alter a picture frame I've had lying around for quite some time.  I picked it up on clearance at TJ Maxx a while ago for $2.00 because it was a little scuffed up.  No biggie, right?!?  This is how I purchase MOST of my pieces that I alter because I know I'm going to be changing them anyway :-)

Any who... I used the Pink Paislee "Noel" paper pad and some mod-podge to create the outer part of the frame.  
Here's the beautiful paper collection:

And here is my finished frame:


I started by cutting all the outer pieces down to size, then the inner pieces as well.  I inked the edges of everything (as usual!!) then applied it to the frame with mod-podge (matte used here).  For the inside, I cut a piece of paper with these beautiful glittered ornaments all over it to a 4x6 size.  Then I stamped the sentiment by Hero Arts and matted it on a red,white, and green plaid paper which is also the same paper I used for the inside portion of the frame.  
Here's a look at the inner portion:


I tried desperately to get a close-up of the glittered ornaments but they just weren't coming out well as I didn't have much sunlight here in the sunshine state today!!!!  Here's the best shot I could get... You can sort of see the glimmer on them!!!!


You can also see a set of Altered Drawers I created HERE and a Winter Wonderland Christmas Tag HERE!!!  Just to give you some additional inspiration :-)

Now it's your turn to show me what you got!!! Or, what you are giving!!! Hahaha!!! 
All entries must be uploaded to the Sketches4All Gallery and tagged JBHBRANDI to receive credit.  I will choose one randomly drawn winner at the end of the hop to receive a FABULOUS prize pack!!!! Remember, you must become a follower of my blog AND leave a comment letting me know you are hopping along!!!! 

(P.S.... My secret word is "BRING")

Here is the order of the hop so you don't get lost along the way:

Stacy - http://scrapwithstacy.blogspot.com (you are here)


Giorgia - Guest Designer for December - http://joyblonde.blogspot.it/


As you can see there are lots of ways to win on the Jingle Bells Blog Hop!! So come on and join in the FUN!!!

Well gang... Thanks sooo much for stopping in and have a LUCKY day :-)

Sunday, December 1, 2013

Believe In Christmas with DCWV "Christmas Made" paper stack!!!

Happy Sunday my fellow crafters.  I sure hope you have enjoyed the Holiday Hop over at Colorful Creations!!! There were lots of recipes, projects, and inspirational pieces to get you in the holiday spirit!!!

DON'T FORGET: Sketches4All also has their Jingle Bells Blog Hop coming to you on Tuesday!!!! Stay tuned for more details!!!!


Any who... I'm here today to share a few projects I've been working on for a number of different reasons.  It's been non-stop around here lately and now that we're in December, it's only going to get busier!!!!
I am entering ALL OF THESE challenges in the current Friday Challenge over at Frosted Designs!!!! The current challenge gives you the following items for which you must use at least one of them on your project:

Tags
Paper layering
Washi tape
Flags/banners
Patchwork
Circles
Stitching
Stars
Flowers
Buttons 
Arrows

I made sure to include a couple of these items on all of my projects and highlighted them in RED throughout the post to make the items I chose easily visible!!!

"Believe In Christmas" with DCWV "Christmas Made" Holiday Stack
The first project I'd like to share with you is a holiday layout I made using photos from last year's Christmas Holiday.  I recently purchased the "Christmas Made" Holiday Stack by DCWV and have had sooo much fun playing with it :-)
We are currently hosting a DT Sketch Challenge over at Sketches4all using this amazing sketch by Brenda Ragsdale:


And here is my Christmas Layout:


Aren't these paper just AMAZING?!?  I absolutely LOVE them!!!! 

This is also my Inspirational Page for my Creative Monthly Project Challenge over at Colorful Creations!!!

 I began by turning the sketch a quarter turn clockwise and then got to work!!!!
I knew when I saw the sketch that I wanted to create a "paper tear" for the triangular "break" down the center of the page.  So, that's what I did!!!  Then, I just cut out various pattern papers from the stack and layered them on to follow the sketch.  Of course, I inked all the edges of pretty much everything on this page with "Old Paper" Distress Ink.  
I matted the photos on the red peppermint paper, then layered atop a piece of chipboard and pop-dotted it atop of the page.  I cut up a glittered pinecone that I had from last year and used those pieces, along with a little hot glue, to adhere them directly under the chipboard.  
Here's a look:

I finished it with various embellishments (including a rose button by The Girl's Paperie which was coated with Gold Leafing,  a circle "Merry Christmas" Sticker by Paper House Studios which I matted with a kraft scalloped circle die-cut,  a couple of die-cuts and a "Gather Together" tag by K&Company,  Webster's Pages "Christmas at Home" sticker,  Cosmo Cricket "Love You" wood pieces,  raffia ribbon, and other embellies by Recollections.    
 Here are other close-ups:


I truly LOVE how this layout turned out!!! And, I had a lot of fun making it!!!!  


"Sparkling Holiday" Handmade Christmas Card 
Another project I wanted to share is a Holiday Card I made for Rachelle's Anniversary Party challenge over at Sketches4All.  Her challenge is to create a project using mainly red and white, with a splash of green and couple of bells.  Since I've been on a roll making Christmas Cards lately I have soooo much "stuff" out that I knew I could get this done rather quickly.  
Here's a look at my card:


I used papers by Mod Podge and Recollections.  I fussy cut the trees from pattern paper and added them to the bottom.


All the papers were inked using the Festive Berries Distress Ink (which is one my FAVS for this time of year!!!) and then layered on!!!  I used my 2" Circle Punch to cut the star from the paper pad and used pop-dots behind it for dimension.  I stamped the Hero Arts sentiment on Ultra Smooth Premium White cardstock by Spectrum Noir, then cut it out and matted it on red,white, and green plaid paper.  I threaded gold ribbon through it for some "sparkle"!!!!  
I finished the card by adding two K&Company chipboard candy canes which I tied a green bow on and hung the bells from.  
Here's a close-up:


This card was very quick and easy, and it came out pretty cute as well!!! I think I have more than enough cards to mail out to family and friends now... But I'm sure you'll see some more in the upcoming weeks!!!! Hahahaha!!!!


Handmade "Monster High" Birthday Card: "Clawdeen"
Okay.... And the last thing to show you is a birthday card I made for my oldest daughter.  Her actual birthday is tomorrow!!! Although her party isn't until next weekend, we are still going to do a small celebration tomorrow (she has no idea!!!) so I thought I'd make a card that totally rocks!!!!
She is IN LOVE with anything Monster High right now, so the party is a Monster High Themed birthday party.  I made Monster High invites per her request, and used left over papers to make this card!!!! 
Here's a look:

I started by layering on various papers, and matting them all with solid black cardstock.  I used a "circles" embossing folder, "circle" Happy Birthday sentiment,  and a black "belt" with "gold circles" as well.  The girl "Clawdeen" was colored in using various Spectrum Noir Markers and Glitter Gel Pens.  I finished it with matted sentiments and a gold glitter star to go with the "Rock Star" theme!!!!

 This card was also entered into Jessica's Anniversary Party Challenge at Sketches4All where the challenge is to use circles on your project.

Well, gang.... As usual... Thanks soooo much for stopping in and have a LUCKY day :-)


Sunday, November 10, 2013

I Will Catch You... If You Fall!

Happy Monday all!!! Hope you had a wonderful weekend and a fabulous week ahead!!!

"I Will Catch You" Handmade Altered Mixed Media Tag
Just a quick stop in today to share with you a mixed media tag I made for the DT November Color Challenge over at Sketches4All.  Here is the color palette you get to work with  (AMAZING colors!!!!):

And here is an Altered Tag I made:


I had TONS of fun making this!!!!  
I started with a "clean" manilla tag, and added gesso with various stencils for texture.  Then I used my Luminarte Paints (soooo vibrant and shimmery!!!) and began my coloring.  Then I started to embellish.  
I printed my quote on my computer on creme colored cardstock, then cut out the words, distressed them, and inked them to match the color "theme".  I inked various wood pieces by Studio Calico and added them between the flowers.  I inked, misted, and added a coat of perfect pearls atop some grungeboard pieces by Tim Holtz.  I topped it off with homemade bling, flowers by Recollections and Heidi Swapp, and various metal knick knacks from Tim Holtz, and Momenta.  

Here are some close-ups:


This is some chipboard from Blue Fern Studios that I stamped an image on, clear embossed, then inked and misted for desired effect:


Well gang.... Thanks soooo much for stopping in and have a LUCKY day :-)


Wednesday, October 9, 2013

Spookiness Galore at Sketches4All!!!


Happy October all!!!! As most of you know, Halloween is just around the corner... Which means we're seeing tons of ghouls and ghosts all over the scrapbooking community!!! Well, there's no shortage here either!!!! Sketches4All is getting a little "scary" this month and I've been quite busy creating some very "spooky" projects!!!  

(If you're here for the GIVEAWAY, please click HERE!!!!!)

"Lady of the Garden": Halloween Layout using K&Company Papers
This is a layout I created for the DT's October Challenge  over at Sketches4All.  The challenge is for you to create a Halloween or Fall themed layout using the following sketch by Brenda Ragsdale:

Here is my "spooky" page:


These are pictures taken from the annual "Howl O Scream" at Busch Gardens Tampa Bay two years ago.  They pretty much set the entire park up as a giant haunted house, scaring the life out of you at every opportunity!!! It's a BLAST!!!!
I picked up these papers last year made by K&Company and I just LOVE them!!!!  It's actually from two different K&Company Halloween themed paper pads and they are both pretty amazing!!!  I followed the sketch quite literally, adding various K&Company embellies also.  I created the "Lady" title and creepy frame using my Cricut Expression 2.  The rest of the title was created using Thickers and chipboard letters by MME that were colored and coated with clear glitter glue.  


"Enter at Your Own Risk": Spooky Handmade Halloween Invitation
Every year, I host an annual Halloween Party at my house!  It's my FAV party of the year because I totally get carried away with all the spooky decor!!!  I also enjoy making the invitations and seeing how creative I can get.  This year, this is what I sent out:

I started by using my Cricut Expression 2 and "A Frightful Affair" Halloween cartridge to cut out the door frame in a burnt orange cardstock.  Then, I used my "distress" stamp and some Timber Brown Staz On ink to create the distress look on the front.  I took a piece of vellum and stamped several "spooky" images on it and positioned the "door" on top of it.  I finished this part by adhering them both to the top of a pre-cut card made with Coordinations "Black Magic" cardstock so that the outside of the card is black and the inside is red.  AWESOME!!!!
The "caution" tape was created in Powerpoint and printed using bright yellow cardstock.  I topped it off with a small dot of black puffy paint to serve as the "door knob" and inked all the edges.  Then I did this 29 more times!!!! Hahahaha!!!!!  I really like how these came out and it really didn't take all that long :-)


"Danger! Beware!": Creepy Handmade Halloween Card
Our DT team over at Sketches4All is also hosting a "Scariest Card Contest" this month in which the winner will receive a $10.00 gift certificate to A Cherry On Top.  The rules are simple.... Just create the scariest card!!!!  (Guess the name kind of gives it away, huh?!?  Hahahaha) 
Any who....  I had a scrap from my Handmade Halloween Invitations lying around but it was cut with Coordinations Whitewash cardstock.   So, I decided to put it to work!!!!  Here's a look:


I'm sure you can see the similarities!!!  I did make quite a few changes to this one though (Since I didn't have to make 30 of them I could get a lot more creative!!!).  I used my "tree bark" embossing folder and embossed the door frame, then went over the raised areas with "Walnut Stain" Distress Ink.  I again stamped some creepy images on vellum and laid the door on top.  I added trim to the top and bottom, cutting up the edges of it to make it look "scraggly" (is that a word?!?) and added a few embellies by Martha Stewart (skeleton brad) and Jolees (White Pumpkin and skeleton key).  
This time around, I actually cut out the strips of caution tape, and made them into "washi tape" for a different look.  I added a brad for the door knob and finished it with "fake blood" left over from last Halloween!!!  And there you have it... A scary, creepy, Halloweenie card!!!! 

"Eager Eyes": Handmade Halloween Altered Tag
As most of you know, I host a monthly "Tag" challenge over at Sketches4All.  Unfortunately, I've seen little participation the last few months and decided to change it up a bit!!!!   Staring in October, my challenge is now called "Once Upon A Theme...".
Instead of creating a tag, members can submit ANY TYPE OF PROJECT (layout, card, tag, altered items, mixed media, etc...).   The challenge will be based on a "theme" each month (adventure, travel, seasonal, etc...).  Since we are in October, this month's theme is "Spooky"!!!!!!   All you have to do is submit a "Spooky" project and you're in it to win it!!!  
Since I do like making tags (and what better tag to make than a Halloween one) I decided to go ahead with my tag mojo for this month.  Here's a look:


I started with a standard tag and inked it up with various Distress Inks.  I found some checkered pattern paper and cut out all the diamonds in it and then adhered it on top.  I took some Tim Holtz sandable paper, embossed it, sanded it a bit, and layered it on.  I used a thick black Sharpie to outline certain areas as well.  The frame was cut on the Cricut Expression 2 using the "Happy Hauntings" Cartridge, and then I heat embossed the spooky tree in the center.  I finished it with several Martha Stewart chipboard embellies, a skeleton key by Jolees, and Tim Holtz crinkle ribbon that was inked and stained.  Voila!!! Another one bites the dust!!!! 


ALSO~~~~~  Sketch N Scrap will be hosting a Holiday Blog Hop staring October 21st so be sure to put it on your calendar and then stop in and check out the details!!! There will be lots of inspiration and TONS of prizes along the way!!!!  


Well my friends, thanks soooo much for stopping in... Have a LUCKY day :-)


Friday, May 10, 2013

Scrap Your Story Challenge #11~ Playing with Simple Stories, October Afternoon, and Pink Paislee!

Happy Friday gang!!! Yep, it's time again for another great challenge over at Scrap Your Story!!!! This week's challenge is a sketch challenge and here is the sketch:

I had some photos of my youngest daughter at my oldest daughter's birthday party last year that I've really been wanting to scrap.  I also received a fabulous prize pack of October Afternoon papers from Melinda over at Let's Get Sketchy that were absolutely PERFECT for this challenge!!!  Here is my "finished product":


She really is just too cute!!!! I told you the papers were perfect for the photos!!!! The collection is called "Fly A Kite" and really is great for "summer" type photos, even though this was taken in mid December!!! Gotta love Florida!!!! Hahaha!!!! I put my Martha Stewart punch to good use and added some embellies by Soft Spoken to finish this off.  Truly a beautiful girl :-)

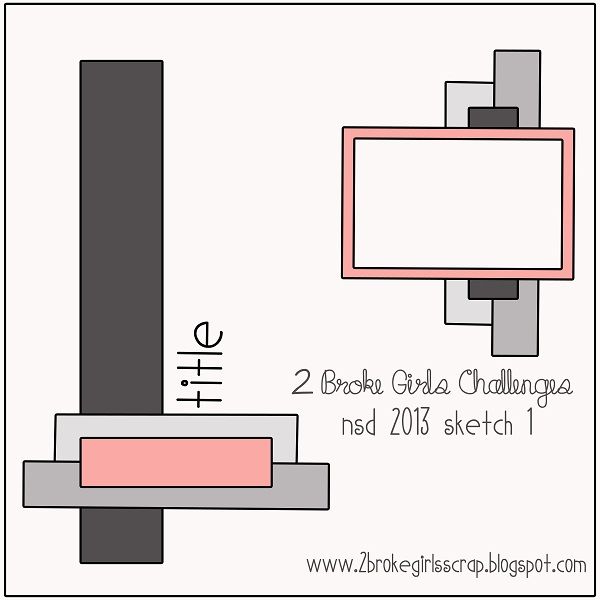
Thanks to Fia over at Sketches4All I was also able to purchase the 24/Seven paper collection by Simple Stories and I just had to play!!! My oldest daughter was awarded Terrific Kid at her school so I figured to use this line for the pics!  This page was entered into Tabitha's Sketch challenge for the National Scrapbooking Day mini Sketch A Thon over at 2 Broke Girls.  Here is the sketch:


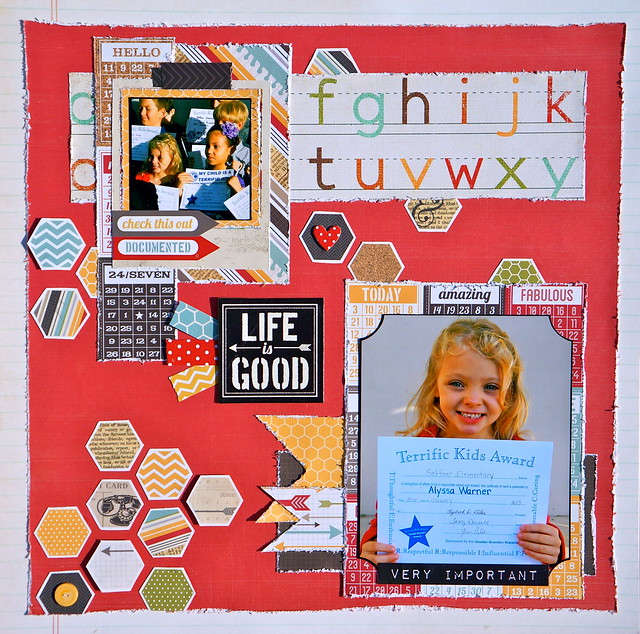
And here is my layout:


I flipped it to accommodate the photos and added random embellies from the kit.  I cut up some hexagons from a paper in the collection, then added them to various areas around the page.  I also used pop-dots on some to add depth!!! 

Another challenge this week is my Twisted Thursday weekly challenge over at Sketches4All where this week's challenge is to create something using only two colors and a stamp.  I decided on a card for my friend's wedding last weekend.  Here it is:


I made a standard A7 card and used a corner punch to accent it.  I pop-dotted the frame around the center for added detail.  I stamped the sentiment and images using Memento ink in Tuxedo Black, then cut out the champagne glasses, colored them in, and pop-dotted them for added effect.  I truly am happy with how this came out!!!

And last, but certainly not least.... For my monthly Tag Challenge over at Sketches4All, I decided to "Add A Tag" to a card!!! The challenge is to add a tag to anything... A card was perfect for this one though!!! 
I've been playing quite a bit with the Pink Paislee "Secret Crush" collection and made this beautiful tag/card combo with it!!! Here it is:

I made the tag first, adding various embellies from the paper kit, a Prima heart-shaped button, wooden clock by Recollections, ribbon, twine, and various flowers.  I then made a very simple card and added this to the cover with a mini "clothespin"!!!  Isn't it just lovely?!?!?

Well gang, hope you have a Happy Friday!!!! Thanks for stopping in and have a LUCKY day :-)


Monday, February 4, 2013

Red and Pink and White... Oh My!!!!!!


Hello again my crafty friends!!! I've been sooo busy these past few days trying to get some pages done for various challenges so sit back, relax and enjoy the show :-) 

A the top of my list are some projects I made for this month's Valentine Challenge over at Sketches4All!!!!   It's a GREAT challenge so be sure to stop in and check it out!!!
As part of the challenge, we were to create either a "traditional" Valentine's colors layout OR a vintage Valentine's card.  Since I LOVE to keep myself super busy, I did both!!! First, I decided on making a layout using a photo of my youngest daughter taken about a year ago.  It just seemed perfect for the colors!!! Here is the sketch we had to use for the challenge:

And here is my layout... I followed the sketch quite literally because I just loved the layout of it! 


All papers are from K& Company as are the tickets and chipboard letters (which are adorable !) and chipboard heart .  I also used various embellies by Recollections, Martha Stewart, American Crafts, and Jolees.  Isn't she precious?!?!?  Don't let her looks fool you though... She's rotten!! Lol!!

I also went for the vintage card as I have NEVER made a vintage Valentine's anything before!!! This is my FIRST Valentine's day crafting and I am obsessed with all the pinks and reds!! They are just pretty together!! Any who, here is my take on a vintage Valentine...


I saw that little girl in a K&Company card making pack and I just had to have her!!! I, of course, dissected the "pre-made" cards and just took what I wanted :-)
The papers are from MME "Love Me" paper stack and are perfect for this card!!! I used a stamp for the "Love Struck" and cut it in half.  I added some pearls and lace and voila!!! My first vintage Valentine is done :-)

Another card I made using the MME "Love Me" paper stack was for Anne's "Say it with words" challenge at Colorful Creations.   The word to use was "Love" and it was quite easy to master!!! I decided on a VERY simple card, cutting the papers down to size, and then cutting the banner out of a piece of pattern paper that already had them on it!!! Easy peasy!!!! And here it is...


Again, I stamped with the "Lovestruck" stamp but cut it in half to keep only the "struck" part for my card.  I heat embossed it with pink powder and then inked with various distress inks.  The title was already on the paper but I did outline it with a silver glitter pen.  Isn't it cute?!?!  

Okay, this is my LAST Valentine's project... I swear... Well, at least for this post!!! We're only at the beginning of the month!!! Hahaha!!!  I wanted to make a "pretty" Valentine's themed tag for my monthly Tag Challenge at Sketches4All.  This month's challenge is to create a tag using fabric.
I started with a standard size tag and inked it up a bit with various distress inks (Spun Sugar, Worn Lipstick, Victorian Velvet).  I laid some Tim Holtz masks down and inked it up a little bit more for them to show :-)  The frame is a piece of craft metal that I embossed with my Grand Calibur and then painted with a white Sharpie paint pen.  I stamped another piece of paper with a script stamp, laid down another mask, then inked it up to match the tag and put it inside the frame.  The trim is by Tim Holtz also (big surprise!!!) and I dyed it with Victorian Velvet Distress Stain until I achieved the color I wanted.  I also added tiny pink rhinestones in the center of each one.  


The ribbon and pearls are from Recollections, hearts and metal key by K&Company, Cupid by Jolees, and metal quote and trim also by Tim Holtz.  I have to say that I am very pleased at the end result.  I think I was able to create what I was imagining in my head!!! 

Now, on to other challenges and projects!!
Colorful Creations is currently hosting a "Press Your Luck" game in which you chose a number on the board and behind each number is a challenge.  My challenge was to create a monochromatic layout using ONLY shades of red.  I thought it would be pretty difficult because it's easy to start switching to pink when you're in the "red" zone.  I tried to keep it all red, and think I mastered it!!! 
The pictures are from my friend Karen's Bachelorette party.  We went on a gambling boat for a few hours and had an AMAZING time!! I have been putting together some pages for her to keep as memories!! This is the second in the batch :-)
I also used this month's sketch from Sketch N Scrap (I site I recently found that provides a sketch twice a month, on the 1st and 15th, for an opportunity to win some goodies!!) to finish my page.  
Here is the sketch:


And my submission...

The papers are by Cloud9 Design and Me and My Big Ideas.  I used flowers by Recollections and rub-ons by Scenic Route.  Not so bad for mono page I guess!! 

And lastly, I'd like to show you a page I created for this week's GDT Heidi Brunelle at Colorful Creations.  Please stop by and check out some of her AMAZING work!! She truly is quite talented!!! 
Here is the sketch we had to work with...

And my layout...

I absolutely LOVE LOVE LOVE this paper stack by Recollections, but I can never seem to make it work for me :-(  I'm not really happy with the page.. it just looks like it's not "my style" I guess... even though I don''t really have a style!!! Hahahaha!!! 
The pictures are of me and my daughter on the dance floor at my wedding.  My stepmother took the photo from the second floor which gave it a really neat view :-)
Anyway, I used various embellies by Making Memories, brads by Basic Grey and Studio G, and flowers by Recollections.  

Well, that's all gang!! As usual, thanks soooo much for stopping by and have a LUCKY day!!! 

P.S.... Don't forget to check out my FIRST EVER Blog Challenge that runs until the end of the month!!! There will be a fabulous prize to one lucky winner so make sure you get your entries in!!!