June 2014

June 2014
Showing posts with label collection. Show all posts

Friday, May 22, 2015

Frosted Designs Friday Challenge: String Art!!!

Hello everyone!!!  I know it' been a while since you've heard from me.  Most of you are aware that my mother passed away earlier this year and everything has really been hectic ever since! 
 
Any who, I'm on the blog today with an altered frame I made for my mother's best fried using last month's kit from Frosted Designs.  It features the Heidi Swapp "Wanderlust" collection :-)
 
Here's a look:
 
 
I covered the frame with some of the paper from the kit, then used trim, flowers and embellies from previous month's kit to beautify it ;-)
 
I added some flowers in the bottom left corner as well as a metal clock from Tim Holtz.
 
 
This challenge is "string art" which is to incorporate string in your project.  I used one of the wooden embellishments from the last month's kit, colored it with gold mist and a gelly roll pen, then added small bits of blue twine for detail!
 
 
I misted the color magic title pieces with gold and added them to the frame!
 
 
I finished the frame with some yummy Creative Embellishments chipboard.  The chipboard was misted with white spray, then I used a gold marker to add polka dots!


Well gang...  Thanks so much for stopping in and have a LUCKY day :-)
 

Wednesday, April 22, 2015

Case File 160 for CSI: Creative Embellishments Guest Design Team!!!!

Hello everyone!!  Creative Embellishments is one of many sponsors this month over at CSI and this is my take on Case File 160!

Just a reminder, here are the details for the case:
(I highlighted all my "evidence" and "testimony" details in red! This is my VERY FIRST time playing along with CSI and it was quite enjoyable :-) )
160 flat

Here's a look at my page using last month's "Out of the Blue" Kit from Frosted Designs:
Phototastic-2015-04-21-19-17-04


I started by creating a background to the bottom half of the frame (or decorative border, whichever you prefer!) using a mixture of Gelatos and Lindy's Magicals over a primed surface (gesso).  I did some second generation stamping using one of the Damask Stamps from the Damask Stamp Set, then added texture with glitter paste and a Tim Holtz Stencil :-)
DSC00648 (2)


I used a transparent overlay for my pic and some paper ribbon to frame it with a circle!
DSC00652 (2)


I used Tim Holtz "Forest Moss" Distress ink to edge my papers for the green color, then distressed slightly with my scissors.  I tucked my journaling behind my photo, documenting our trip to Jamaica and Grand Cayman aboard Carnival Cruise Lines! I also used a Prima metal "This Way" sign for the subtitle as shown in the sketch :-)
DSC00653 (2)

I finished the page with a variety of flowers and a "Journey" flair piece (travel element) from the Nautical Set l Flair set in the CE Store!
DSC00685 (2)


Here's a close-up of the second generation stamping behind my photo piece, and also the heart I added that was inspired from the picture scene!
DSC00689 (2)

Well gang...  Thanks so much for stopping in and have a LUCKY day :-)

Tuesday, February 10, 2015

Making Your Pages "Pop" Tutorial for Frosted Designs!!!

Hello everyone!!  It's Brandi here today to share a quick tutorial with you on how to really make your pages stand out!  It works really well on this month's kit with the soft pinks and light hues of the papers and embellies :-)

Here's another look at this month's "Sweet Love" kit:


Yum, yum, yum!!!!  In love with this one!!!

And here's a look at my page:

See how everything just "pops" against the background?!?  Doesn't it look fabulous?!?  Want to know my trick?!?  A sharpie marker!  Yep, it's really that simple!  No mess, no fuss :-)

Here's a little tutorial to show you how to achieve this result :-)


And here are some close-ups:
I LOVE the zipper pulls in this month's kit!  They truly add a touch of elegance to every page!


I even use the sharpie to outline my stickers and die-cuts!  


Using a butterfly punch and papers from the kit, I created 3D butterflies :-)

I used stickers from this month's kit and goodies from past month's kit to create my large flowers cluster under the photo!

And there you have it!

Thanks so much for stopping in and have a LUCKY day :-)


Tuesday, June 24, 2014

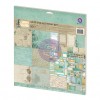
Summer Time Beach Totes with Prima's Seashore Collection!!!

Hello there crafters!!  It's Brandi here popping in to share some projects I recently made using the fabulous Prima Seashore Collection in store!!

Summer is in full swing here in the Sunshine State which means warm HOT weather, tons of sun, and weekend trips to the beach!!  And what better way to celebrate summer than with these fabulous beach totes?!?


This is also my second entry to the Creative Embellishments June Challenge.  The challenge is to draw inspiration from the following photo:

I just love this picture and everything about it!!  Being raised in the Sunshine State means salt water runs through my veins!! ;-)  I was simply drawn to the nautical theme!!!


Aren't they adorable?!?  I used my Cricut Explore machine and some purse SVG's from SVG Cuts to cut everything out!  Then I scored and inked all the appropriate edges and started putting it all together :-)


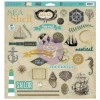
I added several chipboard pieces from the coordinating chipboard pack, inking all the edges along the way :-)  I also used some of the Petaloo flowers (which match this collection PERFECTLY!!) in store to add some detail!


I finished the bags with some hemp cord, and the large tote with some lace form my stash!


Easy peasy, right?!?  And perfect for this time of year :-)


Well gang...  Thanks so much for stopping in and have a LUCKY day :-)


Products used from the Frosted Designs Store: