June 2014

June 2014

Friday, February 28, 2014

Altered Box ~ "Love is..." Mini-Series: Part 3!!!

Hello again my crafty friends!!!  I hope you've had a wonderful month of "love" filled with tons of inspiration from our very talented Design Team here at Frosted Designs!!!! I cannot express how excited I am to be part of such a wonderful (and AMAZING!) team!!!
 
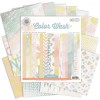
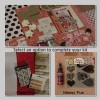
Altered Box using Pink Paislee "Colorwash" Collection
As promised, I am here today to share the last part of my "Love is..." project!!! If you missed one or some of the previous posts, don't worry!!!  I'll be sure to share it all with you today :-)

Earlier in the month, Channa, from Frosted Designs, hosted an amazing challenge called "Love is...".  The challenge was was to create something showing what love means to you, and use the following color combo:


Isn't it gorgeous?!?  Well I loved the challenge so much that I created several projects to showcase the colors, and what love means to me :-)

Here's a look back at the two previous projects:
First a card...

And my "hidden" pocket with a tag that quotes:
"Love is that condition in which the happiness of another person is essential to your own"
Robert Heinlein


Then an altered Altoid can with mini photo book:


And my last project?!?  Well I had to have something to put all this wonderfull-ness in... right?!? 
So I created an altered box using the same papers and embellies from before.  
Here's a look:


I had so much fun playing with these papers and colors!!!  I used a box about 6x6 in size so the papers were perfect!!!  
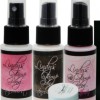
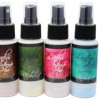
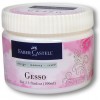
I started by coating my box with a thin layer of gesso, mixed with Lindy's Stamp Gand magicals in Cotton Candy Pink.  These pigment powder paints are fabulous for adding color to your medium, or even water!! After using mod-podge (matte) to layer on the paper, I got to work embellishing!
I started by using the heart stencil in the January kit and molding paste mixed with the same Magicals and Rock Candy distress glitter to create the design around the box.  I used some washi tape to cover half of the heart, and just used the other half, flipping it every other time.  I did this around the top of the lid and the bottom of the box as well.
Here's a close-up of the molding paste with the color and glitter:


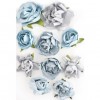
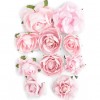
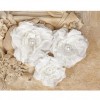
After the design dried, I added various flowers from Kaisercraft, Prima, and others from my stash to the top of the box.  I misted some with LSG and Dylusions sprays to get my desired colors.  
I also made my own bling using liquid pearls, acetate, and a template and tucked it beneath one of the flower clusters.


I used other trim coated with LSG Cotton Candy Pink to wrap around the entire box lid.


I finished it with the sheer pink ribbon from the January kit and created a bow.  I adhered it to the front of the box, adding a small rhinestone flower to the center.


I hope you have enjoyed my little "mini-series"!!!!

Thanks so much for stopping in and have a LUCKY day :-)

Products used from Frosted Designs Store:


Monday, February 24, 2014

Altered Altoid Tin ~ Frosted Designs "Love Is..." Mini-Series: Part 2!!!

Hello all!!!  WOW... Has it been a busy month!!! I've been making all kinds of wonderful Valentine's projects and I just can't stop!!!  I'm in love with all the pretty papers and embellies :-)

Altered Altoid Tin with Pink Paislee "Colorwash" Collection
So earlier this month, I shared with you a card for Channa's "Love Is" Challenge at Frosted Designs which featured a beautiful , soft color scheme.  Here's a reminder of the colors in case you forgot!!!


I was so in love with these colors and overall challenge, that I actually made several coordinating projects for a Valentine's gift (Yes, it's girly... But my husband is use to it!!! Hahaha!!)
Here's a peek at the card I posted:


And my "hidden" pocket with a tag that quotes:
"Love is that condition in which the happiness of another person is essential to your own"
Robert Heinlein


The Pink Paislee "Colorwash" 6x6 paper pad was perfect for this challenge!!! I had so much fun with it that after completing the first project, I just wanted to keep going!!!  So that's exactly what I did :-)

I've seen a few posts in the past about "altered Altoid can" and found them interesting.  I wanted to give it a shot...  So I did!!!  
Here's a look at the finished project:


I love this hexagon paper in the pad... it's very versatile!!! And the Kaisercraft blooms really make it beautiful!!!  I sprayed the blooms with LSG mists in Cotton Candy Pink and Tibetan Poppy Teal,  using Dylusions White Linen spray as a "base coat" for the teal to make a more muted color.  I really like how the "always" sentiment came out! I actually stamped it with a light color, then went over it with my black Sakura Gelly Roll pen which gives it a glossed-over look!


I decided to create a mini photo-book to go inside the can as well.  I simply cut a paper down to 3.5x10 inches and scored at every two inches.  Then I just matted other papers and photos, dressing it up much like a page or card!


I used the wooden heart and word "love" from the Polka Dot Party Word Veneers by American Crafts, and coated them with Blazing Sun, Cotton Candy Pink and Sunset Pink Lindy's Stamp Gand Sprays. Then I cut up the word to spread it across the book.  I also added Studio Calico "tiny stars" which were treated the same way, only I added small splatters of Dylusions white linen spray on them :-)


You can see the two-tone color and shine here... it's fabulous!!!


For the back side of the book I wanted pictures of my family.  So after much digging to find the "perfect" size, I was able to find some pics that looked great with these colors!  I added some MME "tiny word stickers" and DIY Thickers topped with "Rock Candy" Distress Glitter as well!!!


I had to keep the inside pretty simple, and flat... definitely flat!!!  My little book was quite thick after embellishing and I didn't want it to be squished!!! Hahahaha!!!  So I added a tiny banner and the definition of "love" (created in powerpoint and misted with LSG sprays!) to finish it off!


Stay tuned for "Part 3" of my "mini-series" coming soon!!!!

Well gang...  Thanks so much for stopping in and have a LUCKY day :-)

Products from the Frosted Designs Store:


Thursday, February 20, 2014

Playing with Cardabilities and Tim Holtz!!!!

Hello everyone!!!  I hope you have all had a fabulous week so far!!!!  I've been quite the busy bee lately...  Making everything from cards, to layouts, to altered projects!!!  I have several more cards to make and then I should be done for a while :-)

Today, I am sharing with you a card I made for my father.  I wanted a versatile sketch that could be made into a masculine card as my father is a "manly" man!!!  Hahaha!!!  Any who, I found it through Cardabilities!  I knew the second I saw it that it was perfect for style I was going for!!! 

Here's a look at the sketch:


I took out some Tim Holtz papers that I always fall back on when making something for my husband and father and came up with this:


Pretty masculine, right?!?
I started with cardstock from several different Tim Holtz paper pads and distressed the edges with black soot distress ink.  I used Ranger's glossy cardstock to emboss the gears and cogs, then inked it up heavily with various distress inks.  I fussy cut the clocks from one of the pattern papers and matted them with black cardstock.
I added some metal gears and spinners for an added "masculine feel".  I just LOVE the film tape by Tim Holtz and really love adding photos to it!!!  I picked out some of my favorite photos and added them behind the tape.  


I finished it with a metal sentiment piece that reads "Capture Life's Moments" (PERFECT for the film tape!!!) and hemp cord.  

Well gang...  Thanks soooo much for stopping in and have a LUCKY day :-)


Card Sketch #20 at Sketch N Scrap with Heidi Swapp "Mixed Company"!!!

Hello all!!!  Guess what time it is?!?  It's time for another fabulous card sketch over at Sketch N Scrap!!!  Isn't that exciting?!?


"Hello Beautiful" with Heidi Swapp "Mixed Company"
Okay....  Here it is:


And here is a beautiful card I made for a very close friend:


I used the Heidi Swapp "Mixed Company" paper pad because the colors are just soooo pretty!!!!  I kept the card pretty simple as I didn't want to cover up too much of that beautiful paper!!! 
 I started off with my Martha Stewart paper punch to create the die-cut frame of the card.  Then, I used my scalloped circles die by Spellbinders and my Grand Calibur to create some die-cuts for the center piece.  I also used various circle punches and swiss dots embossing folder for texture.  I topped it off with some liquid pearls and a banner stamped with the word "beautiful"in ink by Stampin Up.
I inked the edges of everything with "Spun Sugar" Distress Ink.  I also got to use my spiffy Epiphany Crafts tool that my husband got me at Christmas Time.  I punched out a canvas piece by The Little Yellow Bicycle and added the epoxy atop of it.  Then, I mounted that to a beautiful charm piece that came with the tool.  I finished the charm by adding some twine that can be cut to remove it from the card!!!  
Here is a close-up of the charm and sentiment:


Well gang....  Thanks sooo much for stopping in and have a LUCKY day :-)


Wednesday, February 19, 2014

Deconstructing Jen No. 138!!!

Hello all and happy hump day!!!  Half the week is officially over :-)

I have a quick card to share with you today that I made for a friend in need.  I always look to the Deconstructing Jen website for card sketches but never have the time to complete them with all my other assignments!!!  Well, not this time!!!  It may be last minute, but I finally finished one on time!!! Hahahaha!!!!!

Any who, here is sketch #138:


And here is a simple Black and White card:


This is the first card I've ever made where I left such delicate edges!!!  It just look pretty that way!!!
I used various papers from Recollections (I've had them for quite some time) and washi tape as well.  The metal flower is by Momenta (I love all their metal tid-bits!).
I also used Brilliance ink by Memento for my sentiment by Hero Arts:


Well gang...  Thanks so much for stopping in and have a LUCKY day :-)