June 2014

June 2014

Thursday, November 15, 2012

Christmas Cards Galore!

Well hello again!!! I've been very busy making some Christmas Cards for an upcoming craft show and thought I'd give you guys a peek!!

This first one was rather easy to make.  I used various papers by DCWV and a stamp by TPC Studios.  


For these, I decided on a trifold card using paper by The Paper Studio.  The stamp is also by TPC Studios, with a little ribbon atop.  The other card has a foil sticker atop of white cardstock.
And here's the inside.... The snowflakes were stamped using the Brilliance inks in blue and white.  The sentiment is by Hero Arts.


This card was made using paper by Recollections, stamp by TPC Studios, and plaid Christmas ribbon.


This card was the most fun to make!!! I chose coordinating paper by Recollections and added them to the top of the card.  I separated them with green glitter ribbon and a sentiment by Hero Arts.  The swirl on top of the red is aslo a stamp by TPC Studios.


For this card, I used green as my base cardstock, then added paper by Recollections.  I made a die-cut using one of my Martha Stewart punches and some creme colored paper.  The stamp is another by TPC Studios.  I topped it off with a little hemp cord to add detail :-)

I'm pretty sure this one is my fav!!!! The papers and stamps are by Recollections.  I added a bit of twine to this also :-)


These are pics of a box I made to keep the cards in.  I made them all in sets of four and felt they should each have their own box!!! This is just one of many that were made :-)


And lastly, this card was created for my mid-month challenge over at Colorful Creations.  The challenge is to "scraplift" someone else's idea (of course, always giving credit where credit is due) with a twist.  The twist this month is to create a project using die-cuts.  I found this online through Scrap Happening's Web Blog and thought it was cute as a button!!! I just so happened to have various cartridges for my Cricut machine with these items so I gave it a shot!!!!
Here is the original...


And here is mine...  I chose to make a card instead of a tag.  


Isn't it cute?!?  I used the Christmas Village cartridge for the light post, Ornamental Iron 2 for the "sign", and Give A Hoot for the deer.  I also decided on a different embossing folder for my snow.  Although I happen to have the same one as the original, I thought this one worked better for my card.  Paper is by The Paper Studio.  

Oh, and one more thing!!!! Here's a tag I made for Rachael's monthly tag challenge over at Colorful Creations.  The challenge this month was to make a place setting tag in accordance with the holiday season! 
I used papers by MME and a vellum quote by DCWV.  
I just LOVE how it turned out!!! 


Well gang, as usual... Thanks for stopping by and have a LUCKY day :-)


Sunday, November 11, 2012

November Giveaway!!!!!


C'est Magnifique is having another lovely giveaway on their site!!!! All you need to do is follow the simple rules to be eligible to win some fabulous goodies!!!!  Have a wonderful week gang :-)

Wednesday, November 7, 2012

Quick hello!

Hola mi amigos (y amigas)!!! I just finished another layout that I combined with several challenges and I thought I'd go ahead and share it with you! I'll be quick... Promise!!!!
I originally started making this page for this week's sketch over at Sketch Inspiration.  I always combine their sketch with a challenge from Colorful Creations.  However, I was also able to use it in several other challenges, just by tweaking various things on the page!
I love this week's sketch at Sketch Inspiration.  Here it is...

I love making banners on pages.  It just adds so much detail!
And here is my page...


The title is from Janet's "Quote of the Month" challenge on Colorful Creations.  The challenge is to use all or part of the following quote on your page: All the best moments, are moments that I am with you.
I decided to use the "Moments with You" portion as my title.  Here's a close up...


I used a metal piece by Tim holtz and metal letters by The Paper Studio.  The paper sticker letters are K&Company.  For the page, I started by using a new paper stack called Rustic by DCWV.  I LOVE love love this stack!!!! The papers are so beautiful.  I then combined them with pattern papers by MME that went perfectly with the page.  I hand made all the rosettes to make this apply for Rosey's "Rosette" challenge on Sketches4All.  I topped it off with some decorative brads, buttons, and a little twine to complete this beautiful layout.  I truly love the way it turned out!  

Well gang, as usual... Thanks for stopping in and have a LUCKY day!!


Tuesday, November 6, 2012

First of the Month Challenges!

Well hello everyone!!! I have a few "creations" to show you today so sit back, relax, and enjoy the show :-)
We all know by now that the first of the month means new challenges over at Colorful Creations.  The "Snowflake" card I posted previously was used for my Creative Card Challenge over there.  Another challenge I host there is the Creative Monthly Project.  Every month, I challenge members to get creative by trying new (and old) crafting techniques and tricks.  This month, I went with ribbon scrunching.  I've been seeing it all over the place and decided to give it a shot!!!
I started by using this sketch I found over at Sketches4All.  


I decided I wanted to make a "masculine" page for this challenge and use my new "Fact or Fiction" collection by BasicGrey.  I also wanted this to look like a "file" so I used my corner round punch on the edges and added tabs to the bottom :-)  Then, I matted the photo with a piece of cardstock from the 6x6 paper pad and punched the bottom using the "plaid punch" by EK Success.  I stuck another sheet under it and used the torn paper punch for that one.  I used the left over piece from  the punch and added it to the right side of the photo!  I loaded a few embellies and scrunched my ribbon to complete this page. 
This is a photo of my husband at a local state park a few years back.  Isn't he so handsome?!?!


Here's a close up of these super cute embellies!!!! I LOVE them!!!!

And here's my take on the ribbon scrunching.  It was SOOOOO super easy... All you need to do is lay down some double sided tape (or any double sided adhesive) and scrunch away!! Yep, it's that easy :-)


I am VERY pleased to announce that, starting this month, I will be hosting a new challenge over at Sketches4All!!!  I am soooo excited to be part of their team!!! I was asked to host a Tag Challenge over there since I am in LOVE with making them!! I think they are just sooo pretty :-)
Any who, I wanted to make this tag for a very special friend.  I decided to coordinate this challenge with my card challenge over at Colorful Creations by testing members to use metal on their creations!  I find that I have so many metal embellies that I never use.  I just think that they never "go with the flow" of whatever it is I am making.  So, this month, I decided to conquer my fear and use metal on just about EVERYTHING!!!!! Hahahahahaha!!!!!

I started by cutting a standard tag from a beautiful piece of soft purple script paper from Recollections.  Then, I used my corner punch on the top edges to add some detail.  I distressed all the edges and inked them using Tim Holtz Concord color distress ink. The canvas piece in the middle is by Prima and is AMAZING!!!! It's resist canvas so you can use your distress stains on them and they turn out ever so beautiful!! I actually used Victorian Velvet and Bundled Sage distress stains until I received the desired effect.  
I added a die-cut I received from a friend and I believe it's from "Memory Box"?!?! I inked it using the same inks then added a flower cluster atop of it.  I also used a couple pieces of chipboard from The Dusty Attic and had plenty of fun "making" them!  The fairy was actually inked then covered in white Perfect Pearls.  It's sooo pretty in person!!!
I finished off the tag with pearls, lace, and a metal piece from The Girl's Paperie.  I really love the soft look of this tag.. It just screams "girlie"!!!!!!!!!! 


Well gang, as usual... Thanks for stopping in and have a LUCKY day :-)


Sunday, October 28, 2012

Celebrate the Season!!!!

Okay, I promise I'll make this very quick!!! I stumbles across a new sketch site called Tuesday Morning.  They post a new card sketch every Tuesday for you to complete.  AWESOME!!!!! So I tried my luck at my very first one.  Here is the sketch they provided...

And my card... I decided to make my very first Christmas Card since I started scrapping earlier this year!!!!

Isn't it adorable!?!?!?!  I love this little stamp from TPC Studios.  I actually came across this pack at  Tuesday Morning (the outlet store) so I figured why not using it for this challenge!!!
I started with a standard 5x7 white card base and layering it up from there.   All the papers are from Recollections and the sentiment is from Hero Arts.  I topped it off with a little twine from Sew Easy, a button, and a metal snowflake from Momenta.  There it is.... Celebrate the Season!!!!! 


Following the Sketch!

Well hey there gang!!! I'm sure we're all busy with Halloween just a few days away so I'll keep this short and sweet :-)

I wanted to bring you some photos of sketches I've been working on.  First on the list  is a sketch from Laura Whitaker used in the October Sketch challenge over at Sketches4All.  Here is the sketch to work with...

And my wonderful design!!! (wink*)


I know it says "Daddy's Princess", but truth be told, she's mine!!!! These pics are from Halloween two years ago when my daughter was three years old.  She just couldn't wait to be Snow White!!!
Any way, I started this page by using some left over papers from my Stampin Up! Bandstand Kit and others by SEI.  I followed the sketch quite literally, only turning it a quarter turn clockwise to accomodate my photos.  I added some letters by The Girls Paperie and Gruge Board by Tim Holtz.  The lace on the bottom and lace flower are by Recollections.  I added some buttons and a fabric flower from American Crafts to finish this one off!!!! 

Next on the list is last week's sketch over at Sketch Inspiration.  Here is that sketch...

And my creation...

Yes!!!! She's my diva!!!! She absolutely loves walking around in her shades with a purse and "heels"!!! Lord, help me now :-)
 I decided on using the Simply Stories Summer Fresh line for this because it was perfect for the photos!!!! All the embellies are straight from the kit so this one was easy peasy!!! Isn't she amazing?!?!?!

Last on the list is a card I made for Brenshevia's "Plus 1" Challenge at Colorful Creations.  We were asked to make a project using pink and white, plus a Breast Cancer Awareness logo.  Here is what I came up with...


Well, thanks sooo much for stopping by guys.  As usual, have a LUCKY day!!!!!


Thursday, October 18, 2012

A little bit of this... A little bit of that!

Hey there gang!!!! Hope everyone is ready for Halloween!!! I've brought you a 
"spooky" page to get you inspired as well as a few others :-)
First on the list is a layout I completed for a few different challenges.  I combined sketches from our weekly Guest Designer Camilla Ekman over at Colorful Creations as well as the monthly sketch over at C'est Magnifique.  
These are the sketches to work with...                            


They were so close that I was thankfully able to create a layout for them both!!!! Here is what I came up with...


This is Maya's first time with "piggy tails".  Isn't she just the cutest thing?!?
I started by using papers by Cloud9 Design for everything you see here.  I thought this collections was perfect for this photo!  Then I made some paper flowers with the same paper using various techniques.  The first one I used to make some flowers was by rolling tiny strips of paper tightly, then letting them go and glueing them to your paper.  Here's a closer look..


Then, I made some paper rosettes by simply cutting circles in different sizes, distressing the edges, and adding a brad to the center to keep it all together.  Here's what they look like:


The brad in the red flower is by Studio G and the one in the right is by Recollections.  All the embellies are also by Cloud9 design as I purchased the coordinating die-cuts! 
To capture the swirls behind the photo you see in the second sketch I used some stamps by Inkadinkadoo and Grungeboard by Tim Holtz.  I stamped some flourishes using Staz On Ink in Timber and also some dotted circles by Fiskars.  For the Grungeboard, I used distress stain in Victirian Velvet, then stamped right on top using my Walnut Stain Distress Ink pad to bring out the embossed areas on the board.  I topped it off with tiny rhinestones to create the bling effect you also see in the sketch.  The final look is pretty awesome!!!!!

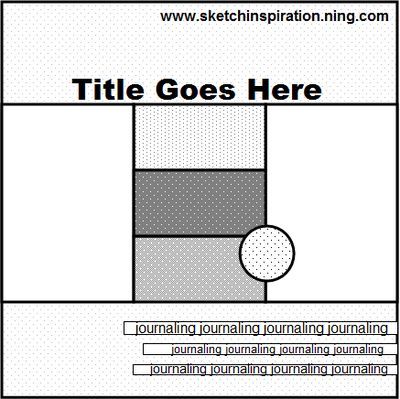
Another page I created for Colorful Creations was for Rachael's Recipe challenge.  I also combined this with the weekly sketch over at Sketch Inspiration.  Here is their sketch...

My best friend Brandi and I attended the annual Howl O Scream at Busch Gardens in Tampa.  Every year, they "dress up" the park with spooky decor and zombies chase you around with chain saws and such!!! It's truly a blast!!!! Any who, here is my layout...


We decided on purchasing these goofy hats to take on the evening!!! So, for Rachael's challenge, our recipe was to use the following items on your page:
  • Halloween Theme
  • The color orange
  • Minimum two photos
  • Use the word spooky, creepy scary, etc.
  • Create your own element
  • Tearing or ripping


I was able to combine all these ingredients for one "creepy" page!  I started with coordinations black cardstock and added a spider web circle die-cut with green glitter paper by DCWV.  I achieved this by using a Martha Stewart spider web corner punch and punched around the circle.  Then, I cut another circle using Recollections Signature Halloween paper and a two-inch border cut using the same paper collections.  I added a little distress ink atop the purple paper to add to the effect.  
I double matted all the photos using the same papers then started dressing it up!  The borders on top and bottom of the paper, as well ate the chipboard black cat in the bottom corner are all by Martha Stewart.  The 3-d black glittered embellishments are by Recollections.  The rest are by K&Company, aside from the title which is Echo Park.  I also used a Martha Stewart roller stamp with cobwebs and rolled over all the photos with black archival ink. To finish off the photos, I tore some K&Company paper, inked it in black, then bordered it along them. The metal piece is made by The Girls Paperie and I just love it!!! Here's a close up:


Finally, we were asked to handmake an embellishment.  I made this witch by using a technique called paper piecing.  This is a die-cut from a Martha Stewart punch that I used on various sheets of paper, then added them all together in pieces, until I got the look I wanted.  Isn't she "scary"?!?!?

Here is a page using pictures from my honeymoon.  This was the first time my husband and I went on a cruise and he was absolutely amazed!!! I shot these photos of him in his glory :-)  I followed a sketch from our Guest Designer last week Samantha Hauzer.  Here was her sketch challenge:


I decided on rotating the sketch a quarter turn clockwise.  Instead of three various pattern papers at the top, I chose to make three banners!  The papers are by Momenta, and the embellies are from K&Company, Basic Grey, and Jolees.  The clear title stickers are from Me and My Big Ideas and I LOVE them!!!! They are by far the best ones I have found!!! So here's the layout...


Isn't he so handsome?!?! 

Alright, I'm almost done!!!! Just a couple more and then I'll leave you alone :-)  The next page was for my Scraplifter's Challenge over at Colorful Creations.  This is my mid-month challenge where you "steal" your inspiration from other's work.  Of course, always giving credit where credit is due :-)
This month, I decided to have the girls lift from their own work!!!! A lot easier said then done!!! I chose to lift from a previous page I made for my Mother's stepfather Norman titled "A Stitch in Time".  Here is that page:

I wanted to stay with the overall "vintage" theme and I had just the right photos to use!  These were taken of my oldest daughter last year at her school.  They dressed them up in vintage attire and used old time props to set the stage!  
I started this page by using paper from Tim Holtz Lost and Found Paper Stash.  I used some corrugated board from 7Gypsies behind the photo.  The photos have been matted on K&Company paper and the embellies are a mixture of Tim Holtz and DCWV paper stacks.  Flowers are by Prima, as are the resist canvas pieces that I am in LOVE with!!! I dyed them using distress stain in Victorian Velvet and Bundled Sage.  She looks AMAZING doesn't she?


Last on the list are some cards I made for some of the strongest people I know.  Two of them I made for our soldiers, fighting for our country, giving their lives for us, so that we may have freedom.  The other is for those who are fighting the battle of Breast Cancer. October is Breast Cancer Awareness Month and a perfect time to get this done.  
Here are the cards I made for our troops:


Very simple, but to the point.  A simple thank you is nowhere near enough to show the gratitude my family and I have for them, but just maybe it will bring them a small sense of joy knowing that we are grateful for all that they do.  
And here is my final one... A card to show my sympathy for all those who lost the struggle to beat this cancer, and to all the survivors for all their hard work.  


Well, it's been a treat and I thank you for stopping in.  Have a LUCKY day :-)


Wednesday, October 17, 2012

C'est Magnifique Blog Hop!!!


Hey there gang!!!! I just wanted to let you know that C'est Magnifique will be hosting a blog hop October 26th-29th!  Be sure to stop in and check it out for a chance to win some FABULOUS prizes!!!!! 
Thanks for stopping in and have a LUCKY day :-)

Wednesday, October 10, 2012

Fall is in the air!

Hey gang!!!! I've brought you photos of some wonderful things that I've been making!!!! Sit back and enjoy :-)
First, I've been anxious to show you a project I made for my Creative Monthly Challenge Project over at Colorful Creations!  I wanted something to represent the "Fall" season and what better way to do that than by making  leaves?!?!  That's right... Making your own leaves and putting them on your layout!!!
I started by browsing Youtube for some great ways to make your own fall leaves.  Then, I went to work!!! I used my leaf punch by EK Success, and various stamps to create the "base" for my leaves.  Then, I cut them out, inked them, and curled the edges to make them look real.  I tried different stamping techniques like stamp kissing to give my leaves unique backgrounds. 

Then, I took those leaves and combined them with some beautiful paper by MME to create this wonderful fall themed page!!!!! What do you think?!?!


I started by using Sketch #339 over at Sketch Inspiration.  Then, I took a foil doily I purchased at Walmart and inked it up to make it blend with the background paper.  I used various Recollections papers and embellishments by K&Company and Jolees to finish it off.  Doesn't it just scream "Fall is here"?!?!

For my card challenge this month at Colorful Creations, I decided to base it around stamping.  And since we are in October, I figured why not make it "Halloweeny"!!! I realize everyone doesn't celebrate Halloween so the challenge is merely to show your stamping abilities.  I just had some new Halloween stamps I had to try out!!!!
I started with a standar 5c7 card base and added some decorative purple paper from a K&Company Halloween themed paper pad.  I stamped some flourishes to add to the background paper.  Then, I punched out some borders with the Martha Stewart spiderweb punch and a gate punch by EK Success and added them to the side of the card. I also added some black webbed ribbon I purchased from Walmart.  Since stamping was the theme, I stamped and embossed a spiderweb at the bottom of the card using black embossing powder along with a couple spiders as well.  I stamped the title and then embossed it with white embossing powder and cut it out.  I then stamped the Halloween girl on the front and colored her in using various stamp markers.  I added some pop-dots behind the girl, spiders and title and voila!!!! Isn't it sooo cute?!?!  After I finished it, I decided to make my invites for my annual Halloween party just like it!!!!  It's just soo awesome!!!!


Another challenge I created this month was for the October Fall Crop over at Colorful Creations.  Since we all know I'm obsessed with my stamps, I (of course), based the challenge around using a "Fall type" stamp.  This can be as simple as making a Thank You card for someone.  Just so long as it appears fall like, we're good!!!!  I had actually just purchased some fall stamps by Inkadinkadoo that I was anxious to use so this worked out great for me!!! 
I started with a standar 5x7 card base using a yellow-gold colored cardstock.  I saw a technique on Split Coast Stampers that I've been wanting to do so I made it happen on this card.  You start by dry embossing your image on your paper.  Then, very lightly roll over the raised area with a brayer and some embossing ink.  After clear embossing your image, you ink it with whatever colors you like.  Once it's completed, you pull out your brayer again and roll over the top again with a very light layer of glitter glue.  It is actually very pretty in person.  I finished it with a stamped sentiment that says "gratitude" and some punched borders.  Here's a side view so you can see the glimmer!!!!


Continuing on the Halloween theme, I decided to also make some tags for some very special people.  The first is another bookmark to add to my husband's collection, and of course following the "Tim Holtz" theme.  
I used a tag cut at 5x2 1/4 and added some Halloween paper by Paperhouse Studios.  Then I inked over the tag with various Tim Holtz distress inks.  I stamped and embossed a spooky tree from Studio G and a spider web by Recollections.  I added some black artist tape and orange webbed ribbon, letters from Echo Park and button by K&Company, then finished with a metal piece and Wrinkle Ribbon by Tim Holtz .  Sooo spooky!!!!!!


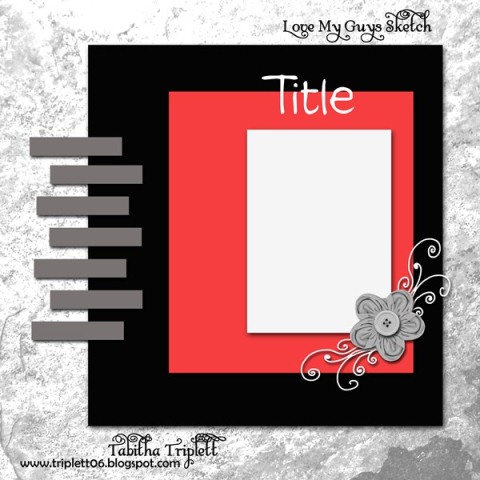
I then decided to make my mom a Halloween tag using a sketch by Pagemaps.  Here is the sketch...


And here is my tag...


Papers are by K&Company and DCWV.  The embellishments are by K&Company, Recollections, and Martha Stewart.  I added some Studio G ribbon at the bottom and various ribbon at the top.  I think this one is just adorable!!! I'm sure my mom will love it too!!!

Okay, now getting back to "normal" scrapbooking... I made a beautiful page for Anne's "For Girls Only" challenge over at Colorful Creations.  The challenge was to scrap summer photos using fall colors.  I also combined this with Rosey's Tricolor challenge at Sketches4All.  Her challenge was to use rust, brown, and teal. For this one, I used Sketch# 340 from Sketch Inspiration.   Here is the sketch...

For this one, I used a paper by Recollections Signature collection and punched it with the Lucky8 Punch (AWESOME!!!).  Then, I cut up a paper by MME and used my "funny cut" scissors to make them look wavy.  I added the strips to the center of the page to meet the sketch.  I used two K&Company borders at the top and bottom of the strips, chipboard pieces from the K&Company Seaglass collection, then stamped some tropical leaves around the page.  I also used a tiny bit of Gesso in the bottom left corner to stamp a tropical flower.  I cut up a journaling paper by Making Memories and wrote about the photos.  These are pics of my oldest daughter on Father's Day of this year.  We all went to Picnic Island here in Tampa and she was soooo excited to collect seashells!!! I love the soft look of this page!!!! Isn't she darling?!?


Now, yet another page from my sister's Senior Year album!!! Can you believe I'm only half way finished??? Feels like I've been making pages for nearly a year!!! Anyway,  I used last week's Guest Designer sketch from Colorful Creations and combined it with another of Rosey's color challenges.  This one was to use black, white, and lilac purple. Since purple is my sister's favorite color, i went ahead and made it for her!!!
The papers are by Coordinations and DCWV.  I used a punch by EK Success to make the side borders.      I matted all the photos using the same purple paper.  The ribbon behind the title I purchased at Walmart as well as the zipper flower.  The metal title is by "Making Memories (I think).  I have to say, I'm not typically a fan of the colors I used but I think this came together nicely.  


Alright gang, I'm almost finished!!! Just stay with me for another moment and I promise it'll all be over with!!! Hahahaha!!!!! The next page I did was of a photo of my youngest daughter about a month after she was born. 
I used sketch #341 at Sketch Inspiration as my base.  Here is that sketch...

I used my Sampin Up! Bandstand kit to make this page.  For my border, I used my Martha Stewart Large Daisy Punch and my Martha Stewar Large Circle cutter for my circle behind the photo.  I rotated the sketch a quarter turn counter-clockwise to accomodate my photo.  I finished it with various K&Company embellies and tiny ribbon flowers.  I love how bright and vibrant this one is!!!!


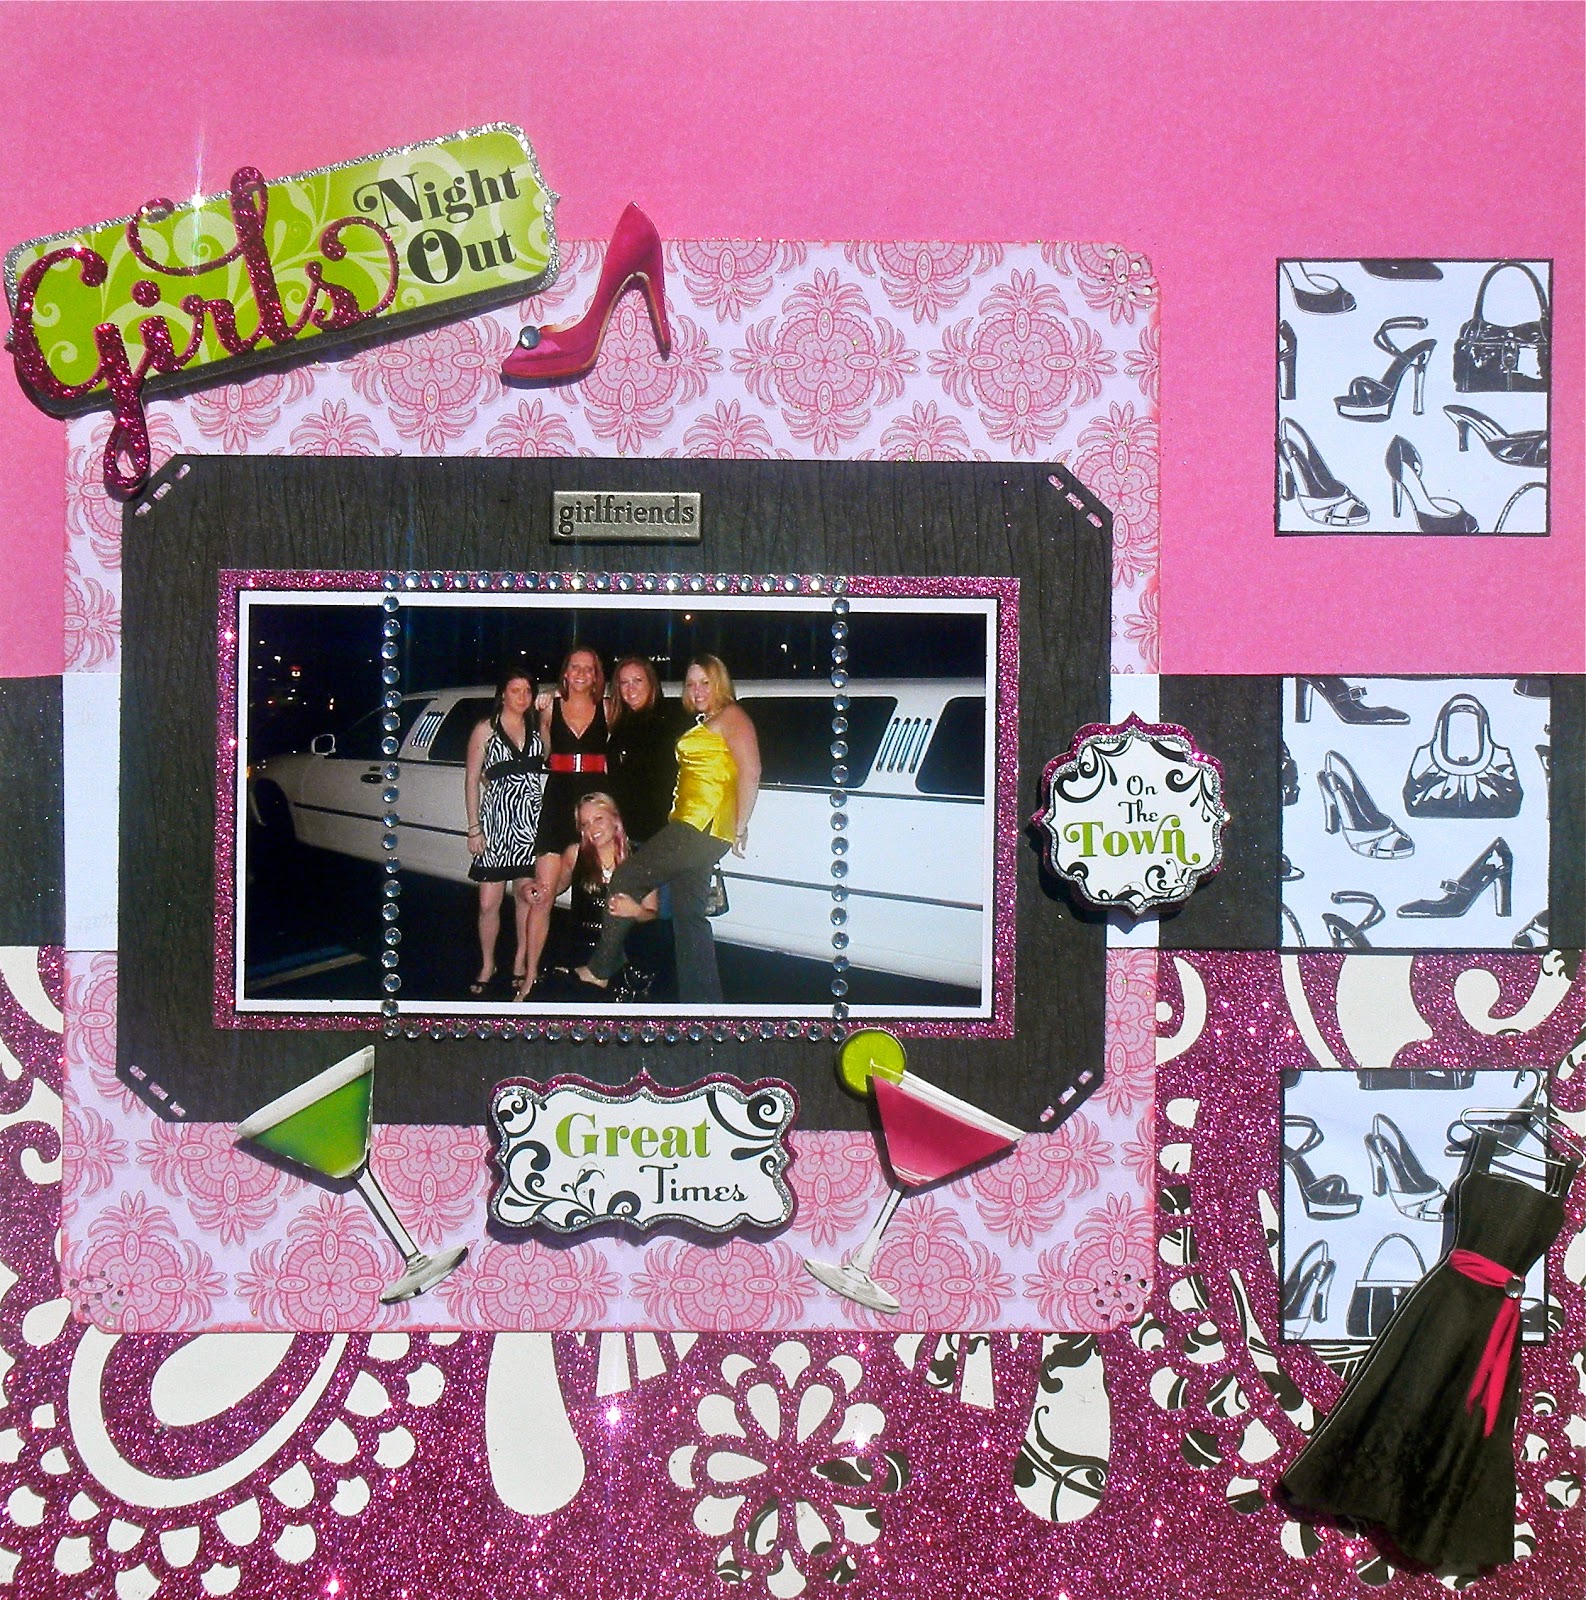
And lastly, I bring you a photo of "Girls Night Out"!!!! This is a picture of my girlfriend's and I on my 25th Birthday.  We had a limo for the evening and a night on the town.  What a blast!!!!!
The papers are from SEI, DCWV, and specialty glitter die-cut by K&Company.  The embellishments are by Paper House Studios.  This one was pretty simple as I followed the Guest Designer sketch from Colorful Creations last week.  Go pink!!!!!!!!!!!


Well guys, thanks soooo much for staying this long!!!! And as usual, have a LUCKY day :-)


Sunday, October 7, 2012

C'est Magnifique Bits and Pieces Giveaway!!!!!

Hello fellow scrap fanatics!!! I thought I'd share with you the opportunity to win some FABULOUS prizes!!!! C'est Magnifique is hosting a Bits and Pieces Giveaway this month!!!! All you need to do is visit their site and follow the simple instructions to be entered to win!!!! Isn't that amazing?!?!?  While you are there, be sure to check out some of the wonderful work from their AMAZING designers!!!! Thanks for stopping by... Have a LUCKY day!!!!!